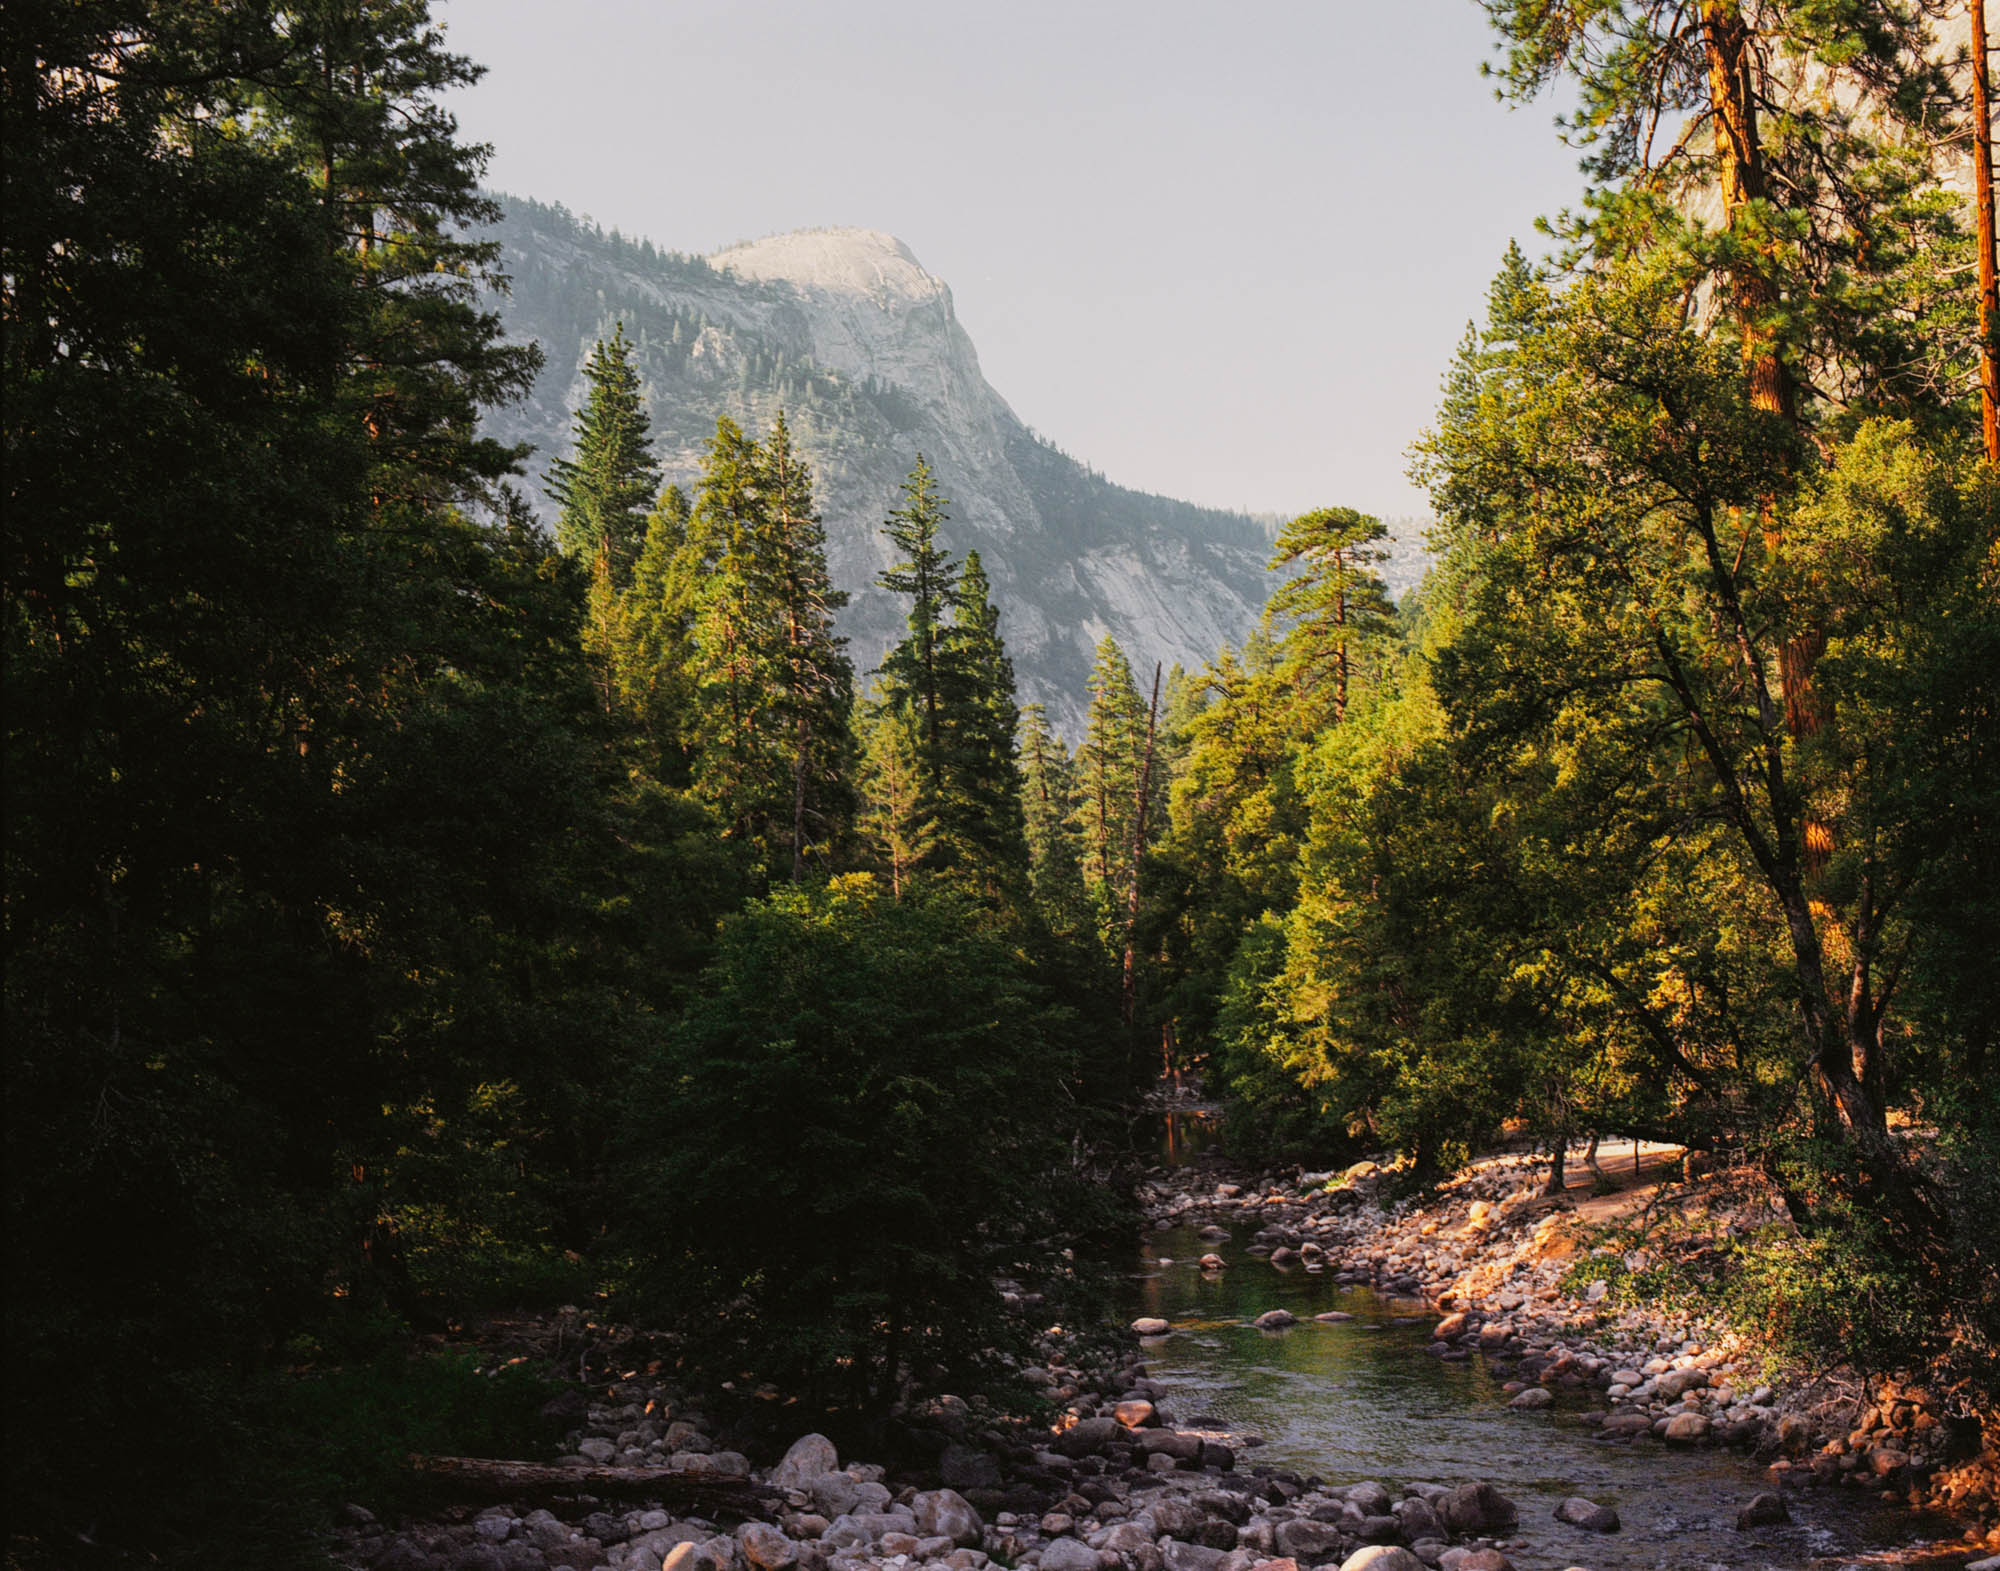
Yosemite in the summer on Pentax 6×7 medium format film camera
It’s been a while since my last post. I’m glad that I’m back on time for the summer. I was a big Lana Del Rey’s fan years ago. In her songs, I got the impression that summer is the most beautiful season of the year. All the summer vibes in her music are so goldenly youthful, vivid and full of lust for love. From her “Young and beautiful” lyrics, a perfect summer scene stuck in my head and I will forever looking for a summer moment in mid July, when the heat turns overwhelmed along with the humidity and the fruits are so ripe with all the juice about to burst out of their soft skin just before they turn rotten in the heat of summer. I just love how lively and vigorous but also nostalgic summer is in her mind, it’s the best suit for young and wild hearts that are full of love in the relentless summer heat.
My photos are quite different than what I posted here before, I don’t know why my “style” [if I had one] has changed but I’m glad with how it looks now. It’s a coincident when I wrote the intro for this post and realized how Lana Del Rey’s summer vibe was so similar with what I got here.
Here’s the slideshow for quick look at the series.
I like to begin the set with the photo of apples fell on the ground beneath an apple tree. The composition is not my best but I like how the apples lead our eyes from the bottom right of the frame to the top left. I like that the apple in the bottom right is out of focus giving a sense of depth in the photo.
apples on the ground
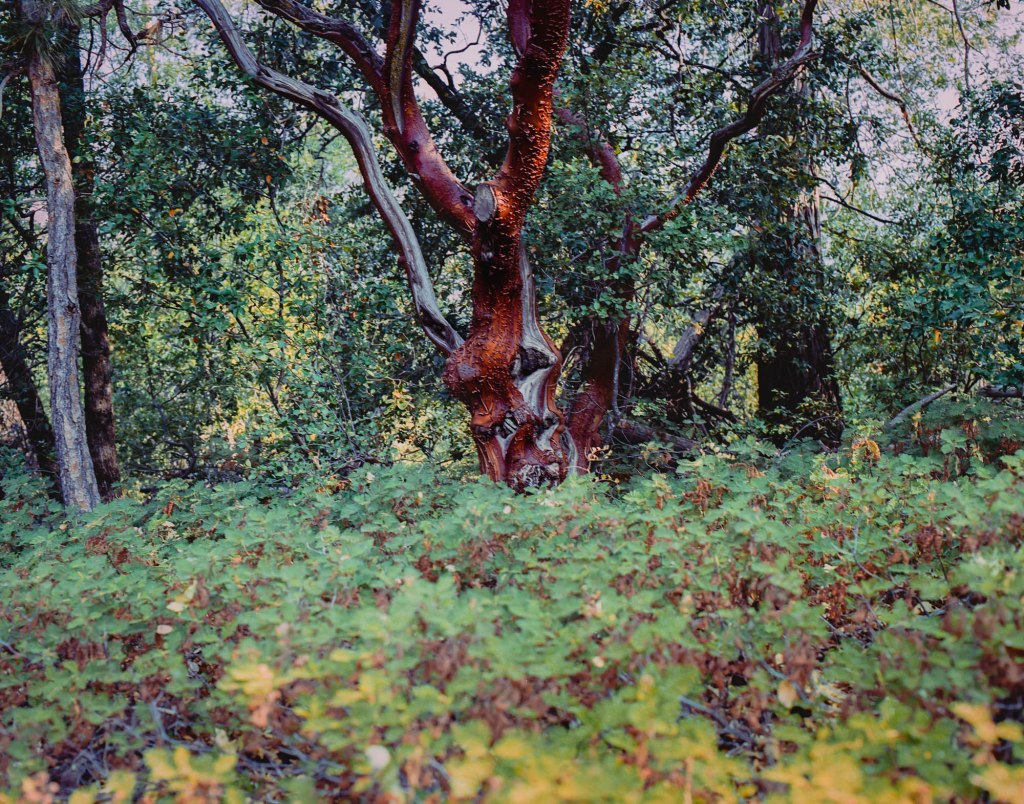
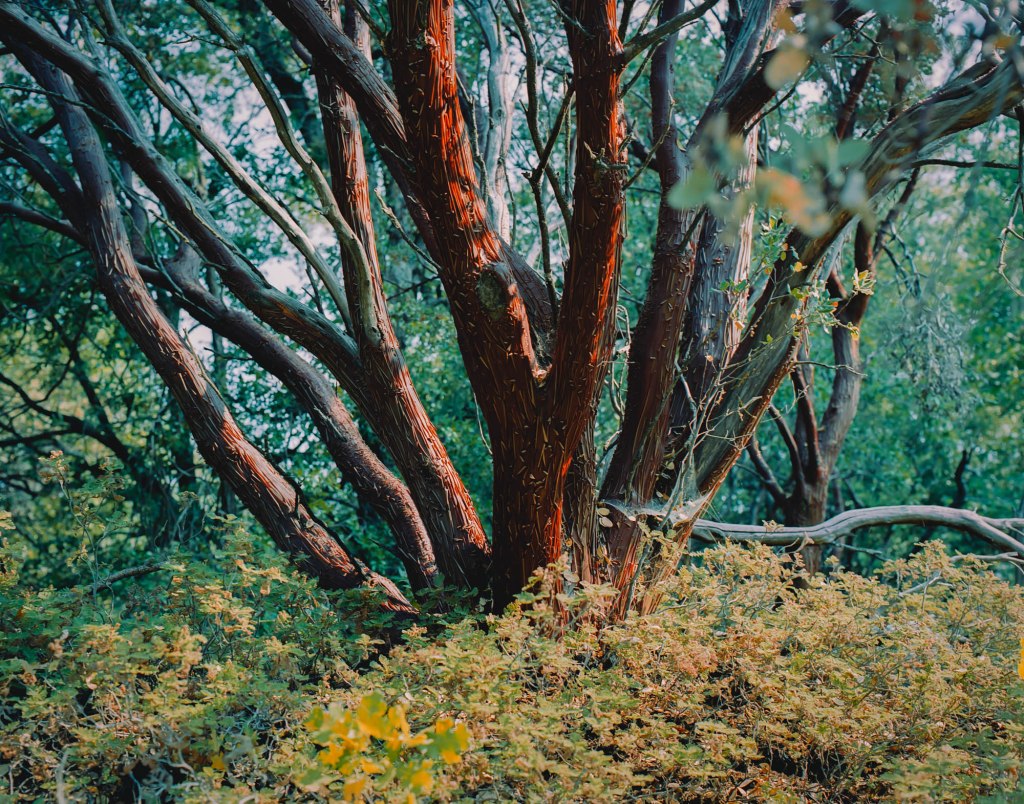
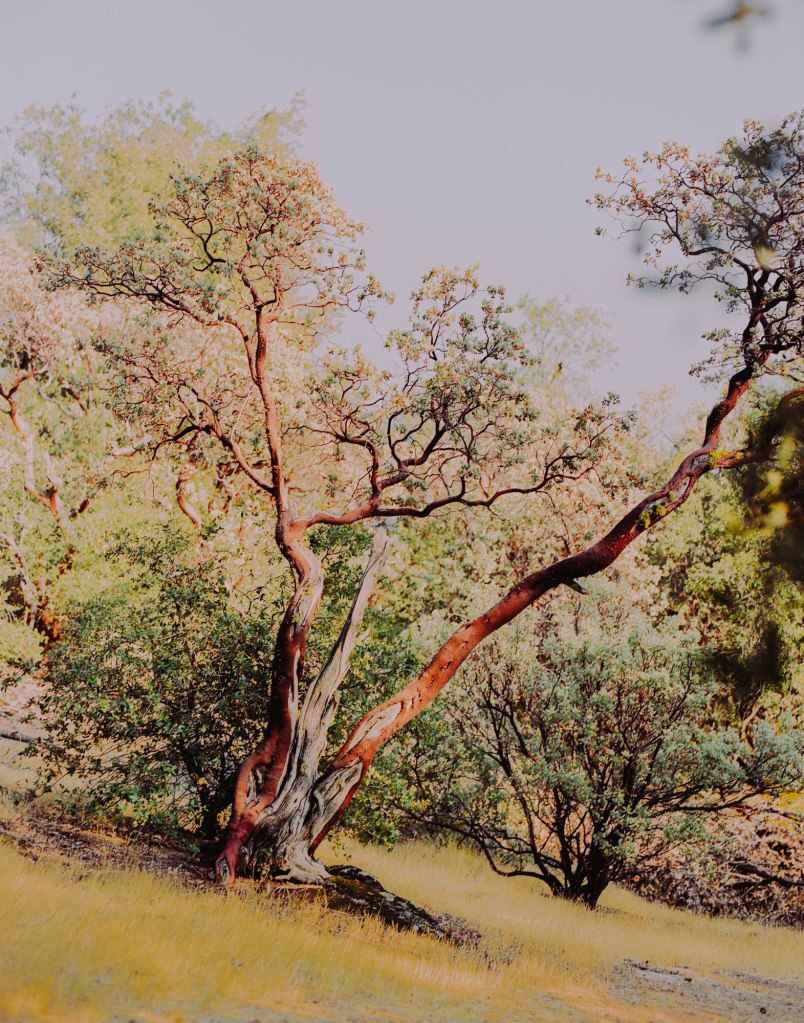
The next three photos are from an afternoon walking around my airbnb house. I was fascinated with the reddish tree trunks that look so vivid in the sun light. I like how the red and green contrast each other in these photos.
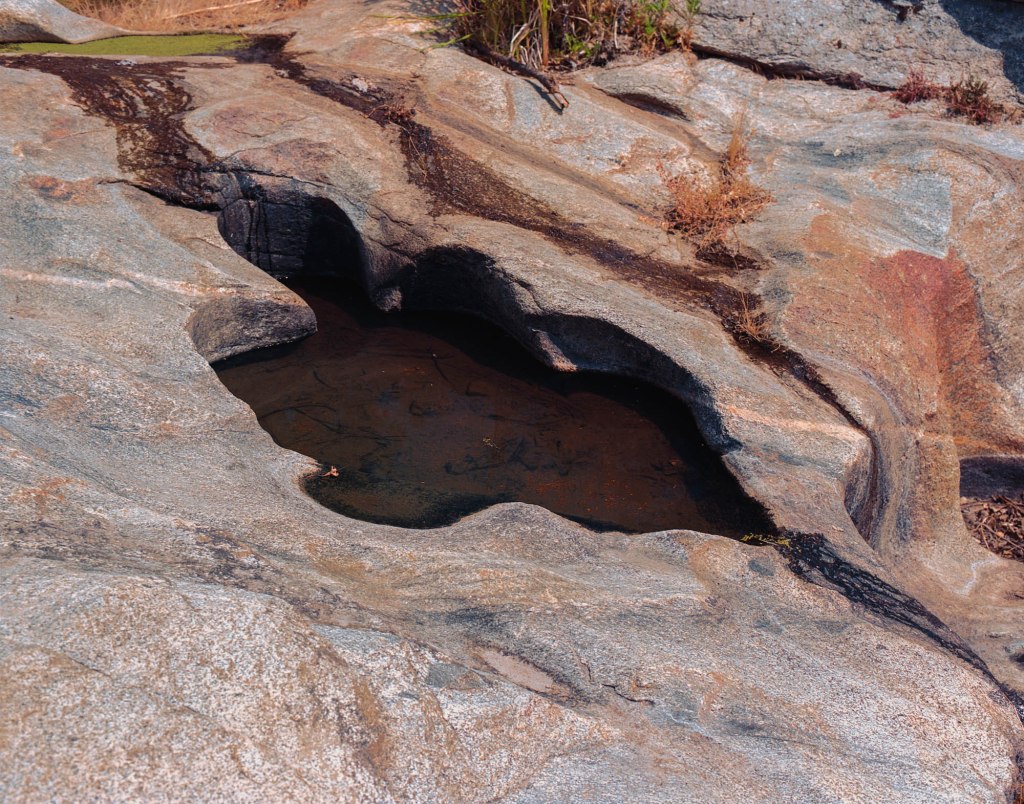
Next, I walked to a small waterfall near my airbnb house in the following morning to scout the waterfall and enjoy my time alone with my camera. The waterfall was nice but there weren’t a lot of water sine it’s summertime so I stepped on rocks that supposed to be under water to look around and go upper the stream.
How the water carved the rock into those interesting shapes
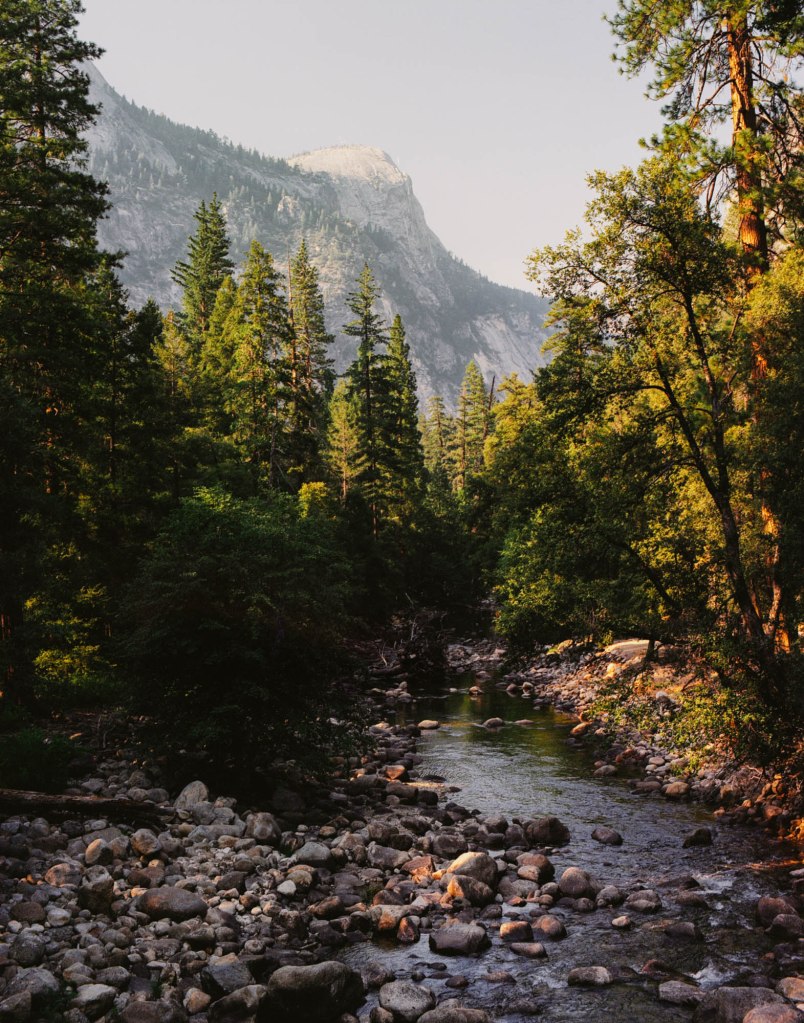
A scene from the upper stream. I like how green the bank was with many kin of grass and plant. Such a cute little eco system.
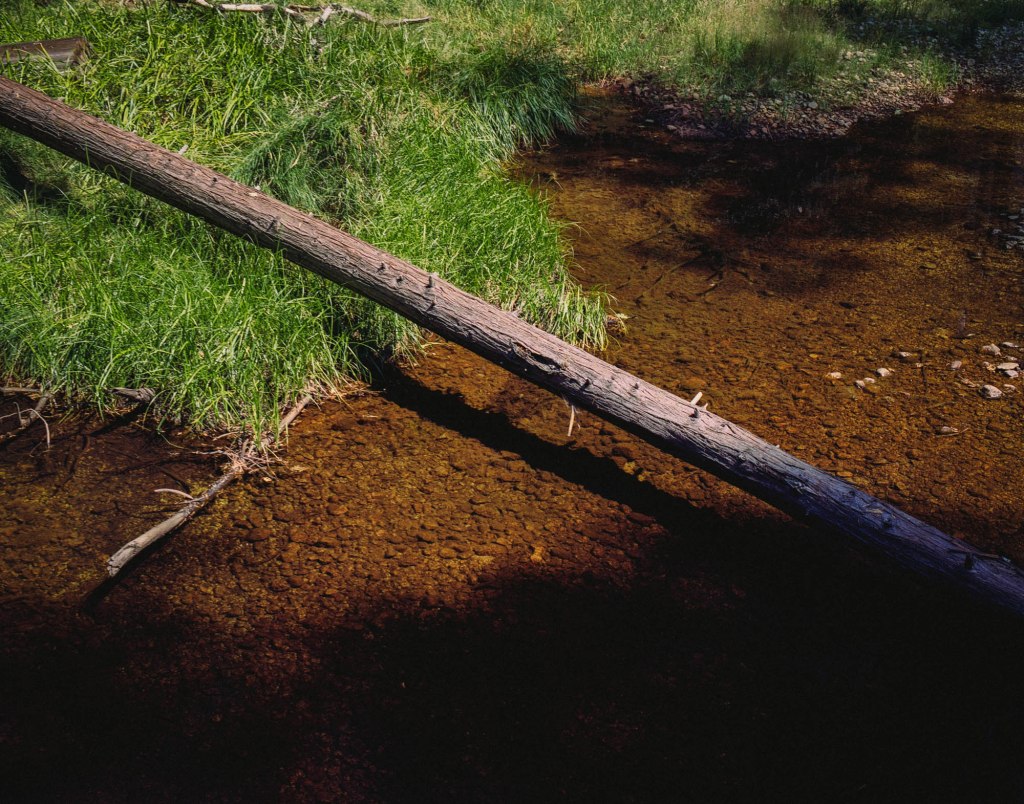
My favorite from the batch. I used the polarizer filter to cut out most of the reflection in the water. I love this photo because there’re so many things to look at, I like the fact that there’re many kind of plant around the stream and they brings so many shades of greens and yellow into the photos. I also love the texture beneath the water giving the nice pattern of purple and brown/yellow. I can remember the heat and moist atmosphere of the summer noon looking at this, and I love how peaceful and satisfied I felt when I was alone in this stream. I wish I tried with different variations of the polarizer filter to play with the reflection because I think there’re so much more in this scene that I can get out of.
On my second day in Yosemite, I went inside the National Park and visited some famous views. The first stop was Tunnel View. The view was beautiful but I wish the sky were clearer rather than misty and hazy as in the photos.
Tunnel View
A scene under the bridge
A view on the Vernal Fall hike
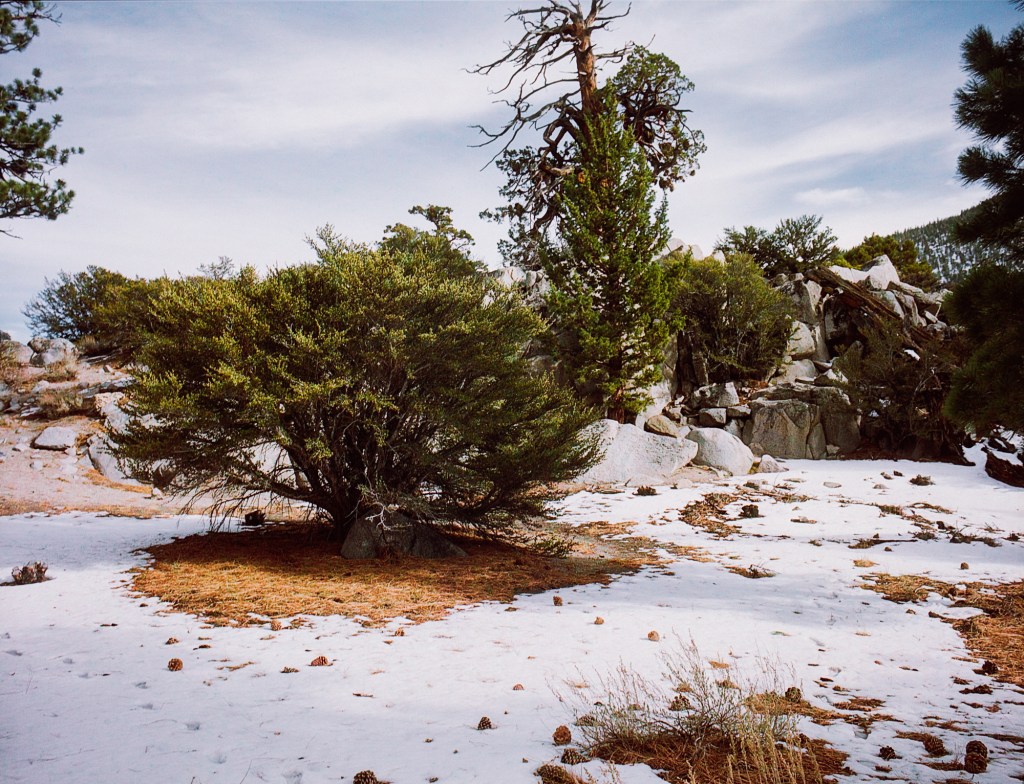
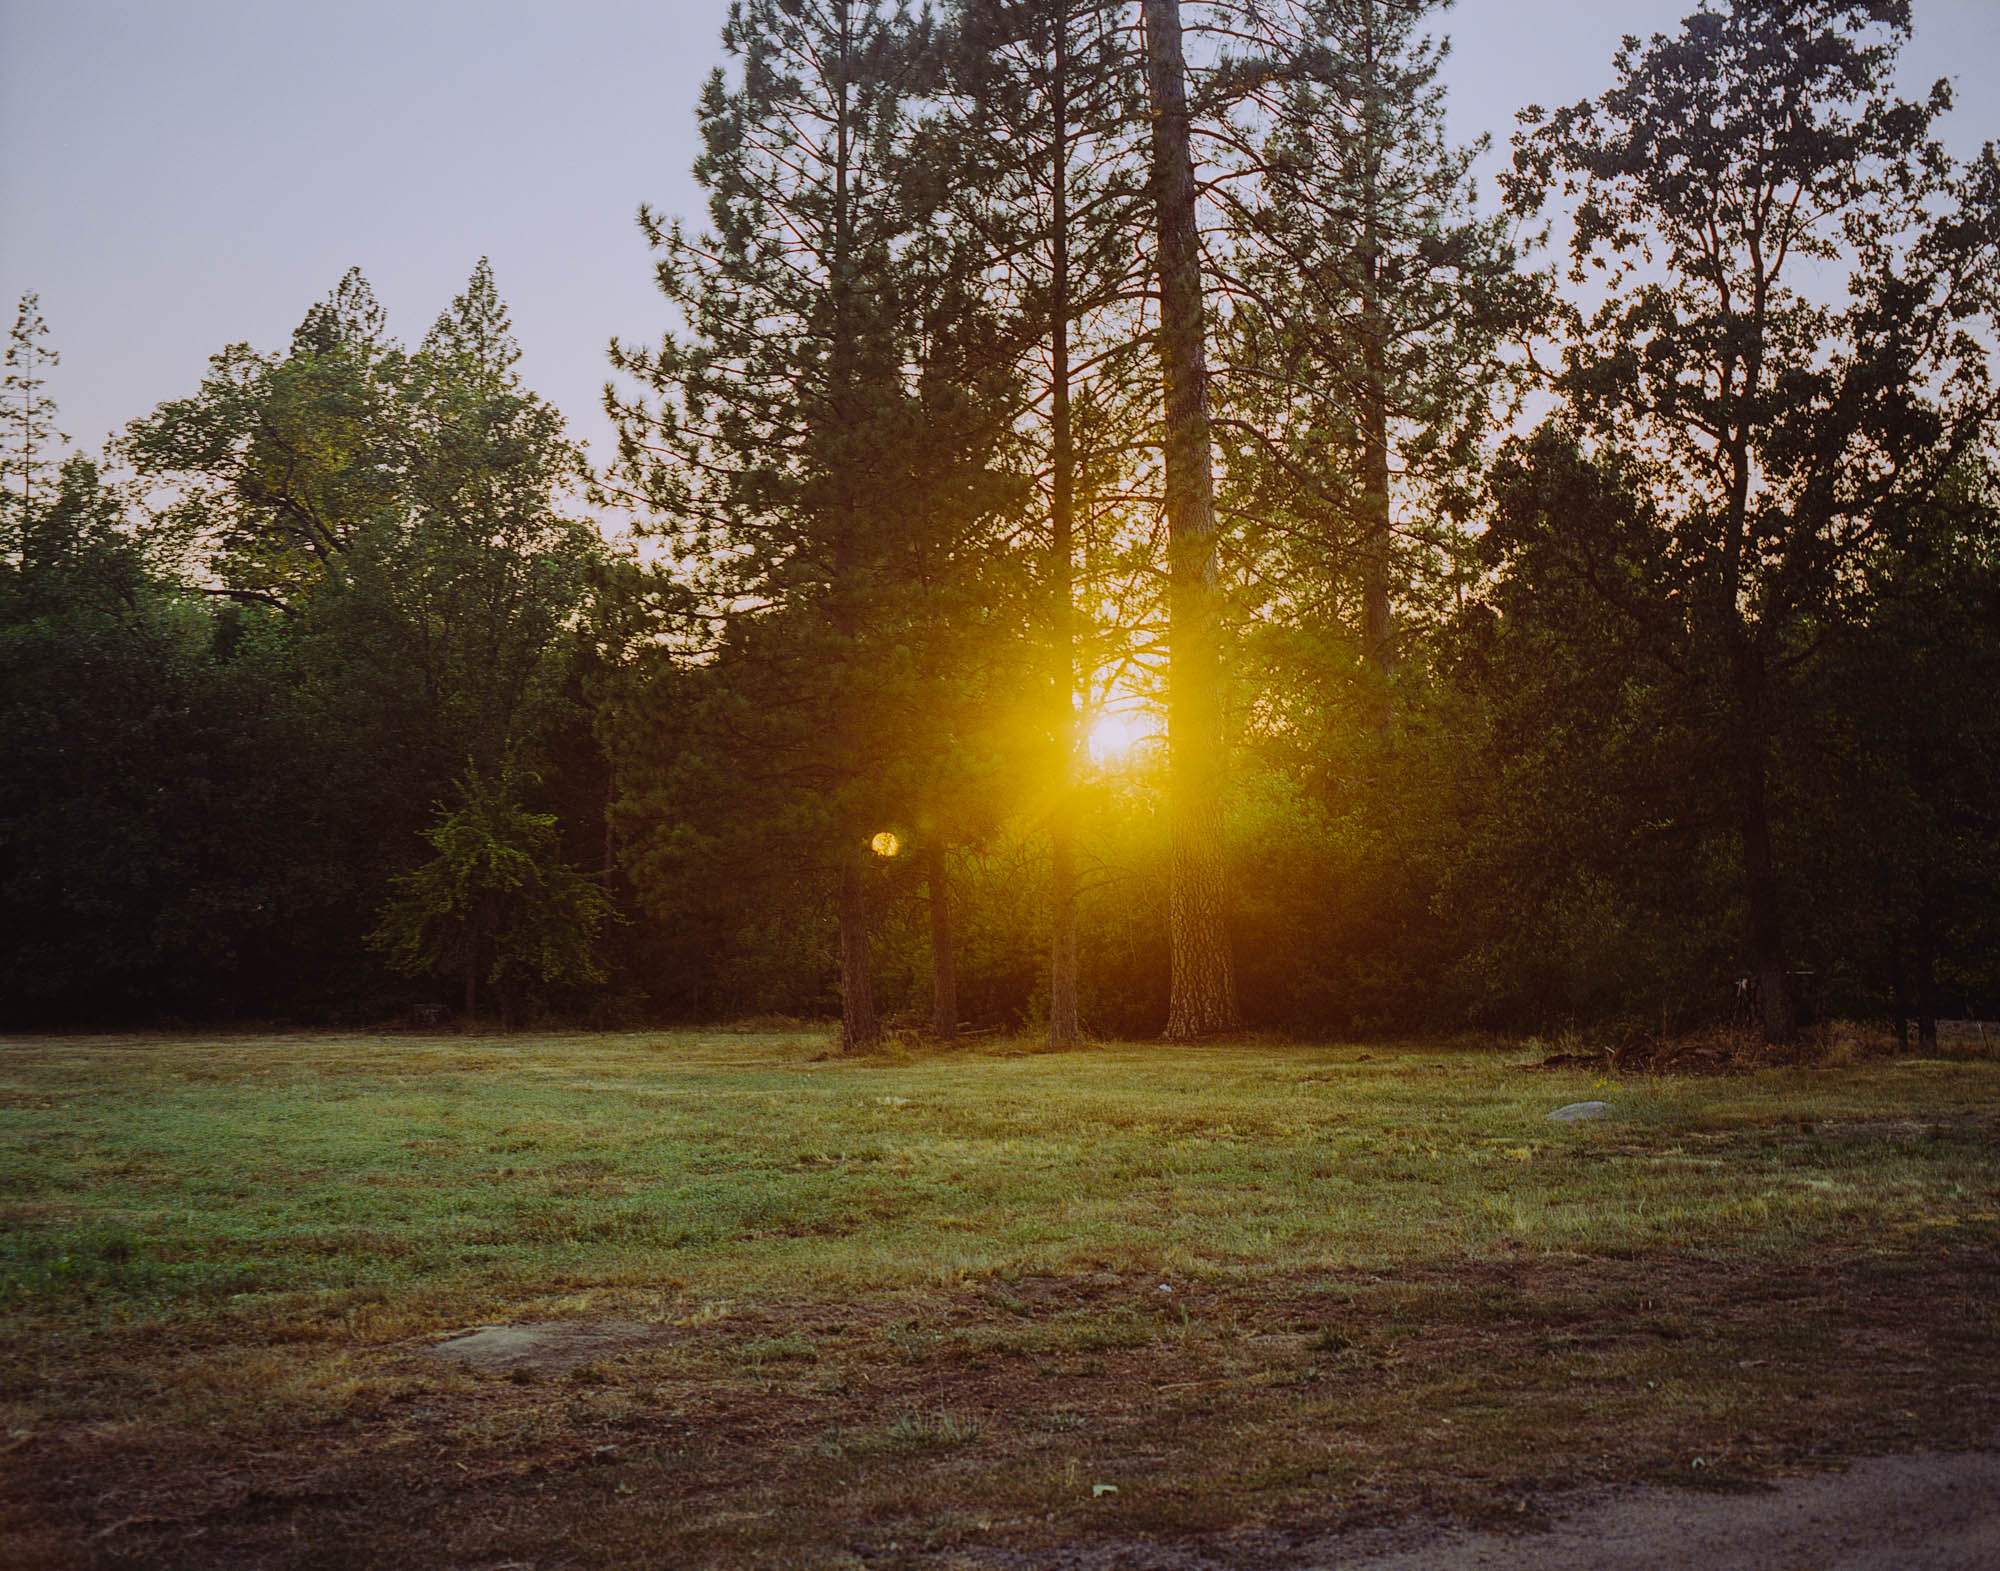
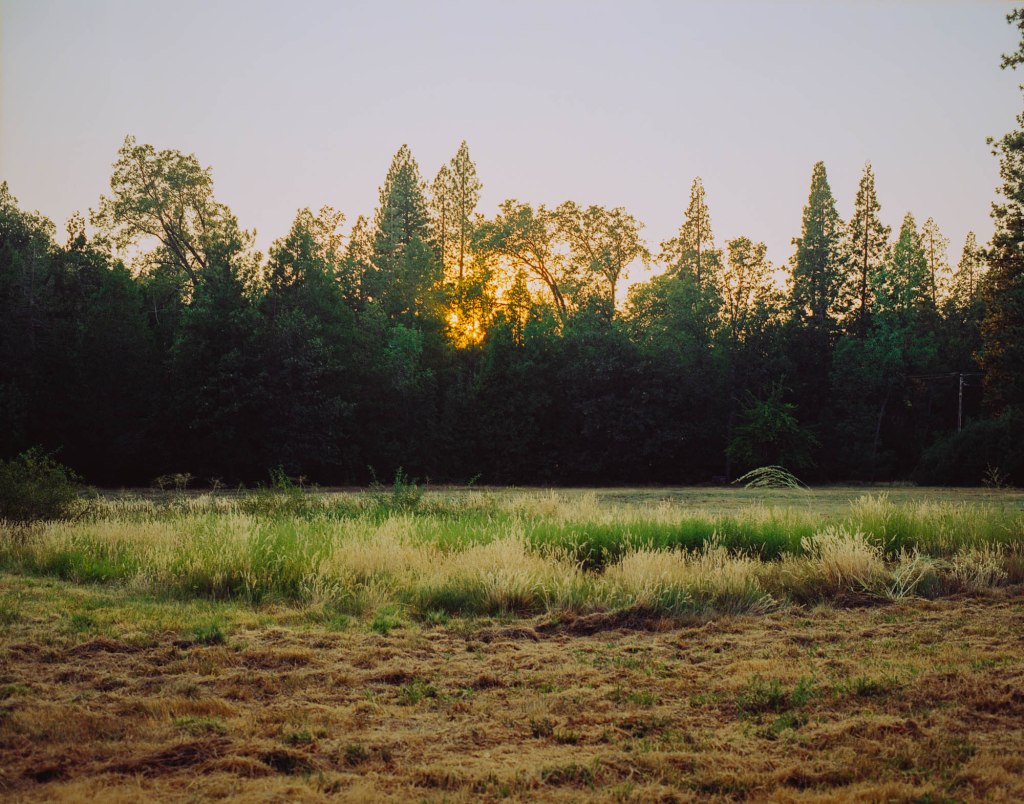
In the afternoon, I walked around the house again for some more discover. Here’re some photos that I like from the walk. I love the tree below because of its interesting gesture. I thought I need a wider lens to capture the whole tree but this frame still balance to me so I’m quite happy with it.
Sunset through the trees
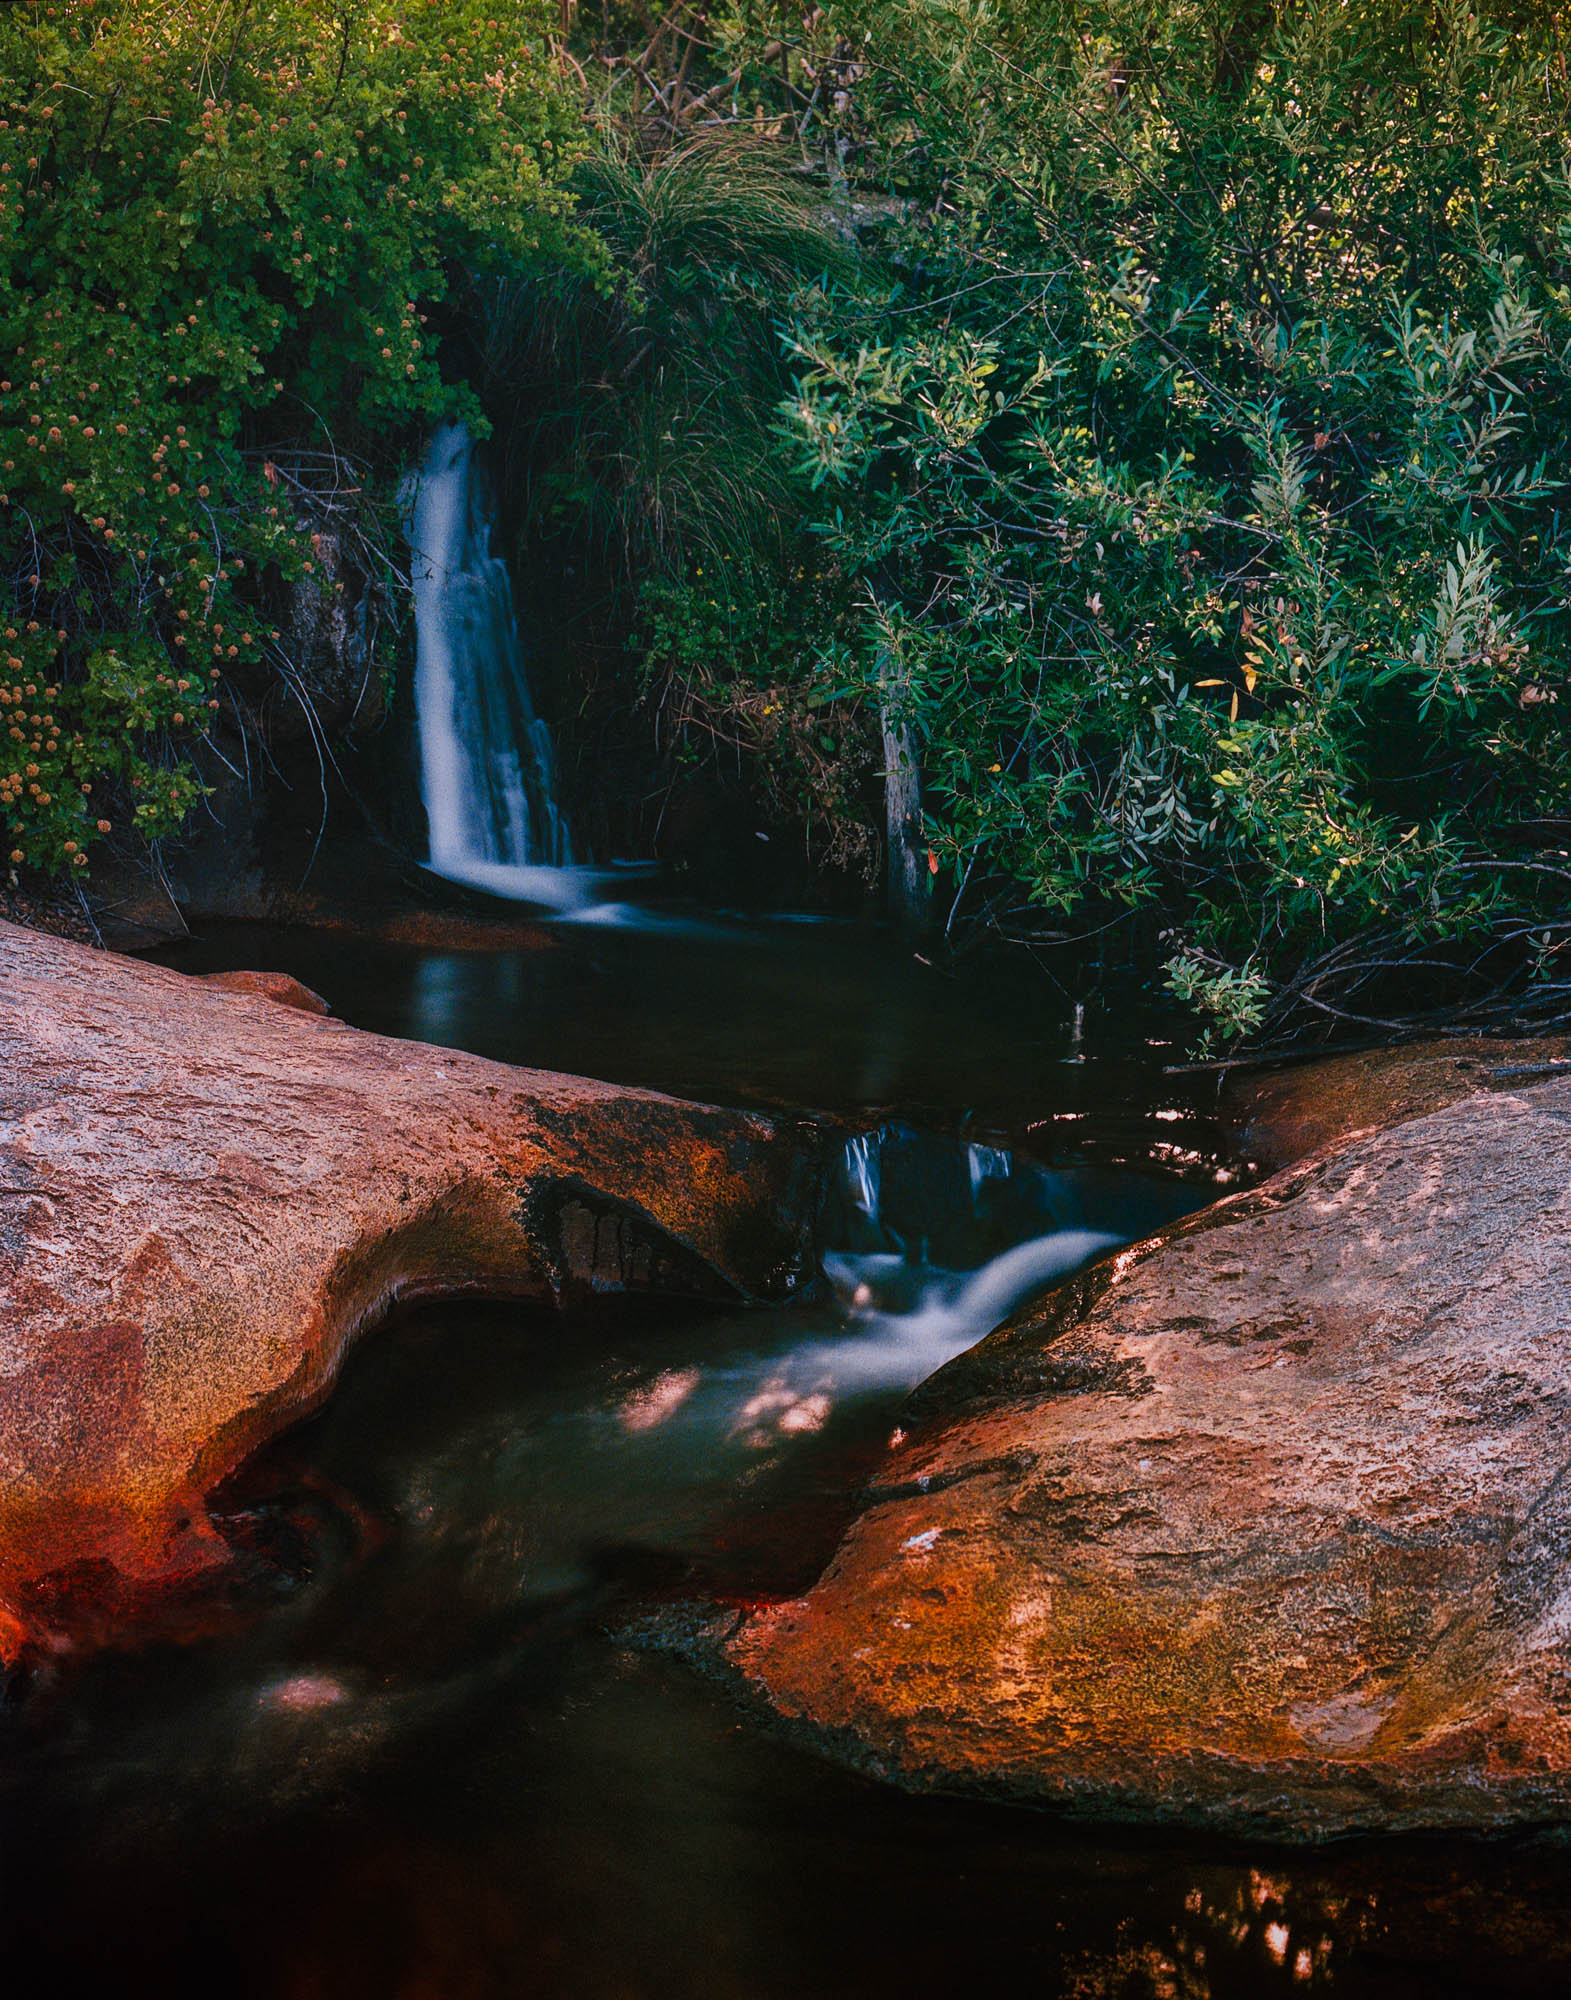
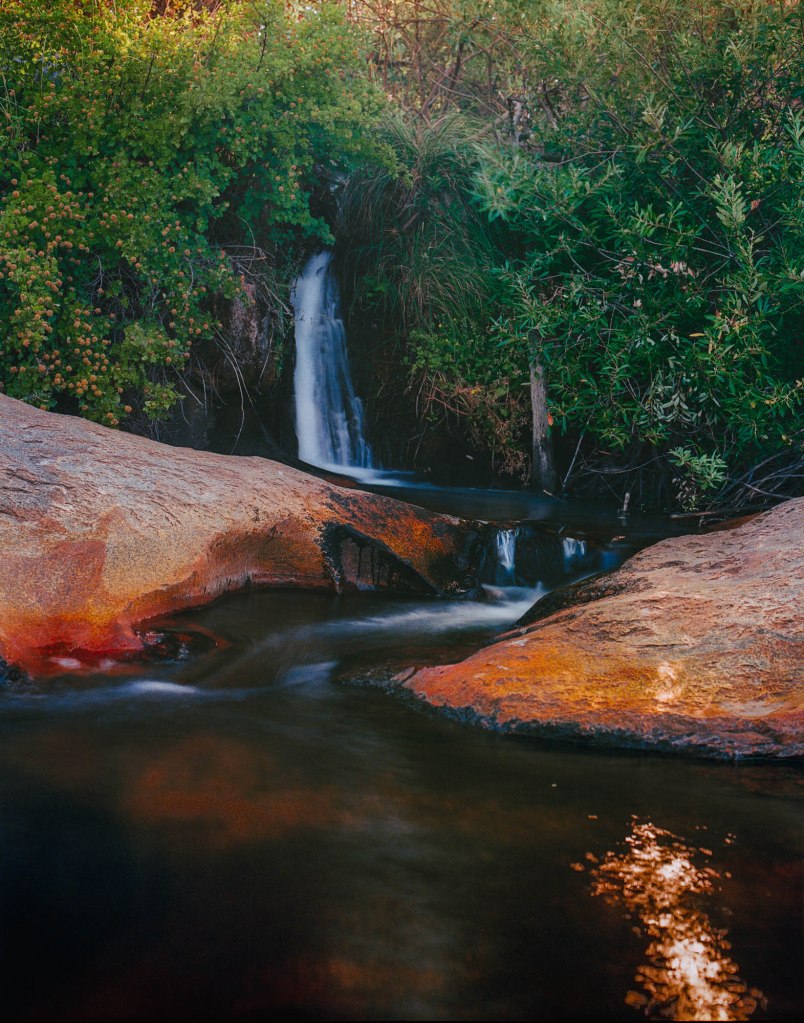
On the following day to Glacier Point I brought my digital camera instead of the Pentax 6×7, I end up didn’t take much photos because of the hazy sky but I still got some photos that I might like. But in the end, I just love the feeling of shooting film. Lastly, I walked to the near by waterfall in the last morning in Yosemite to make some long exposures. Here’re the results.
I took these photos backlit so the waterfall is quite dark, but I like how the waterfall is nicely placed against the dark background. I like the second shot better because the rocks at the bottom feel much stronger and dominant. The orange of the rocks contrast nicely with the greens in the photos. I also like there’re some patches of sunlight peak through the branches and appear on the stream. However in the first photo, I like the sunlight’s reflection on the water at the bottom right and the sunlight hitting the leaves at the very top left of the photo, I think they add more dynamic to the photo. But over all I like the contrast in the second one better.
After these shots, I fell into a pond while trying to get over a rock to compose my next shot. My Pentax get wet and stopped working. Although it means I have to send the camera to repairman now but I don’t feel regret or upset at all, that’s my choice, and to me all will be worth it if I got some photos that I’m proud of. So, cheers for a vivid beautiful summer.
Panoramic photos weren’t interesting to me from the beginning but since Nick Carver shows how wonderful panoramic photos can be, and other Youtubers’ talked about the Xpan and panoramic photos, I slowly get curious of this format. After awhile, I think I enjoy looking at panoramic photos because of the wide scenes and so much elements we can include in one frame. The feeling of looking at a photo from left to right slowly to appreciate the details and how the elements interact with each other in the shot is very enjoyable to me. So I tried panoramic photos for the first time, with my Pentax 6×7.
In other methods I saw on Youtube, most people use the adapter for the 35mm film canister and load the film into the camera with an extension paper at the beginning of the film roll so they don’t waste the film while winding the camera for the first shot. The down side of this method is you have to unload the film in the dark when you finish the roll, because you cannot rewind the film back into the canister when you finish so you have to go into a dark room or put your camera in a dark bag to take the film out of the film back and rewind it into the canister. This will limit your shooting experience in the field, if you can’t have a access to a dark room or dark bag, you cannot take the film out and load the new roll in. So I came up with this method, including 2 film canisters/cassettes, one is your brand new canister and one to take the film in, this one acts like the pick up spoon in normal scenario, but it can protect your film from the light.
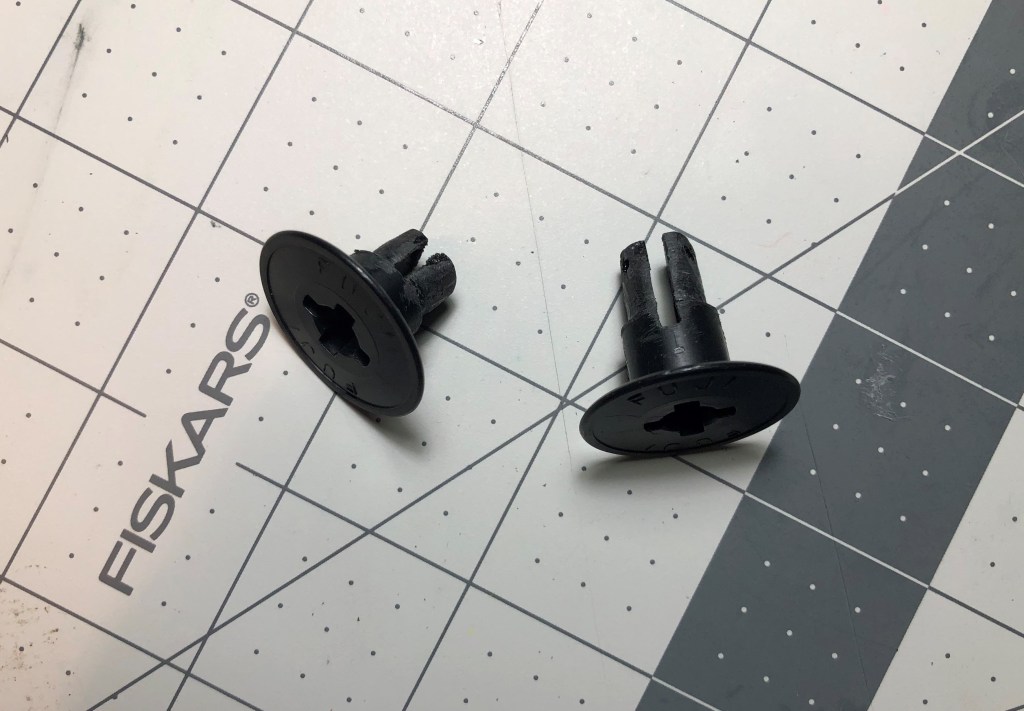
First, I made 2 pairs of 35mm film cannister adapters from old empty 120 film spoons. You can buy them dirt cheap online but on the day I wasn’t be patient enough to wait for the delivery so I made my own. It’s not beautiful at all but it works well. If you do it yourself like I did, one thing you should make sure is checking the length of the adapters carefully, so when you put it on the 35mm film canister, it will have the same height as a regular 120 film spoon. If it’s too high, it won’t fit in your film back, if it’s too short, it won’t stay straight and neat in your film back, this may cause damage to your film back.
One pair of adapter
Left to right: regular 120 film spoon, 35mm empty cannister and 35mm new film cannister. Make sure they have the same height.
So, how to prepare your pick up canister? We’re going to step 2.
Step 2: Made the pick up canister/cassette from a old empty film canister/cassette, which still has a short amount of film left so you can tape a piece of paper on the actual film left. This piece of paper I cut from a backing paper of a 120 film roll, measured the wide is 35mm (same as the wide of the actual 35mm film) and the length is 18 cm. I taped one end of the paper strip to the film left on the old cannister and then taped the film lead from the new film roll to the other side of the paper strip, as photos below (step 2b).
Step 2a: Tape the paper strip to the piece of film left inside the empty cassette
Step 2b: Then tape the other side of the paper to the film lead from the new film roll
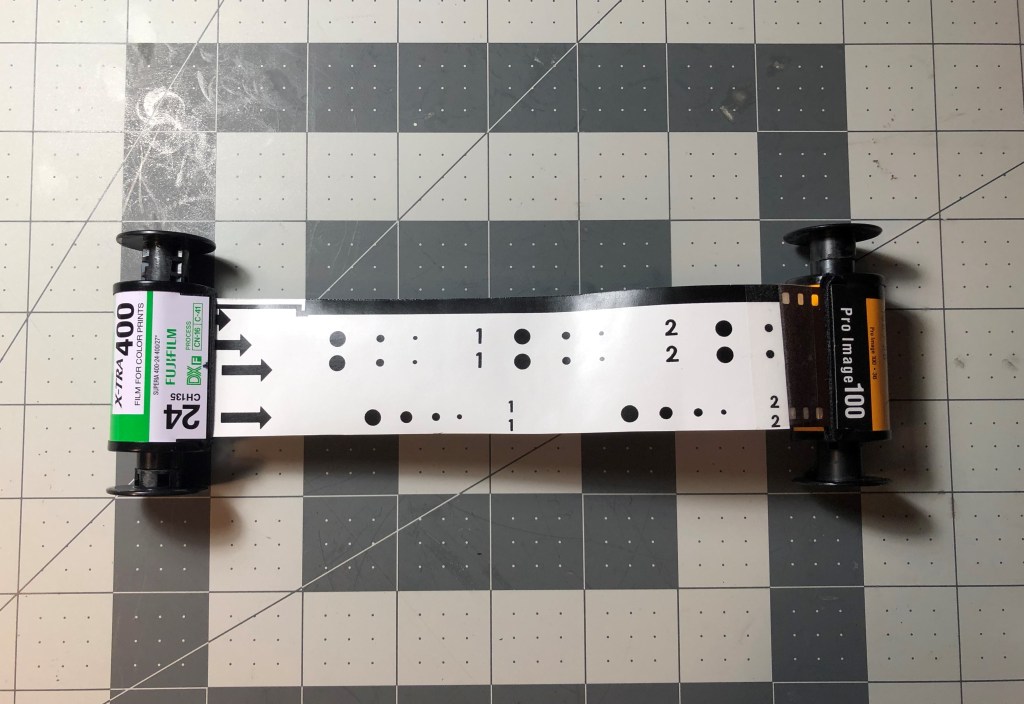
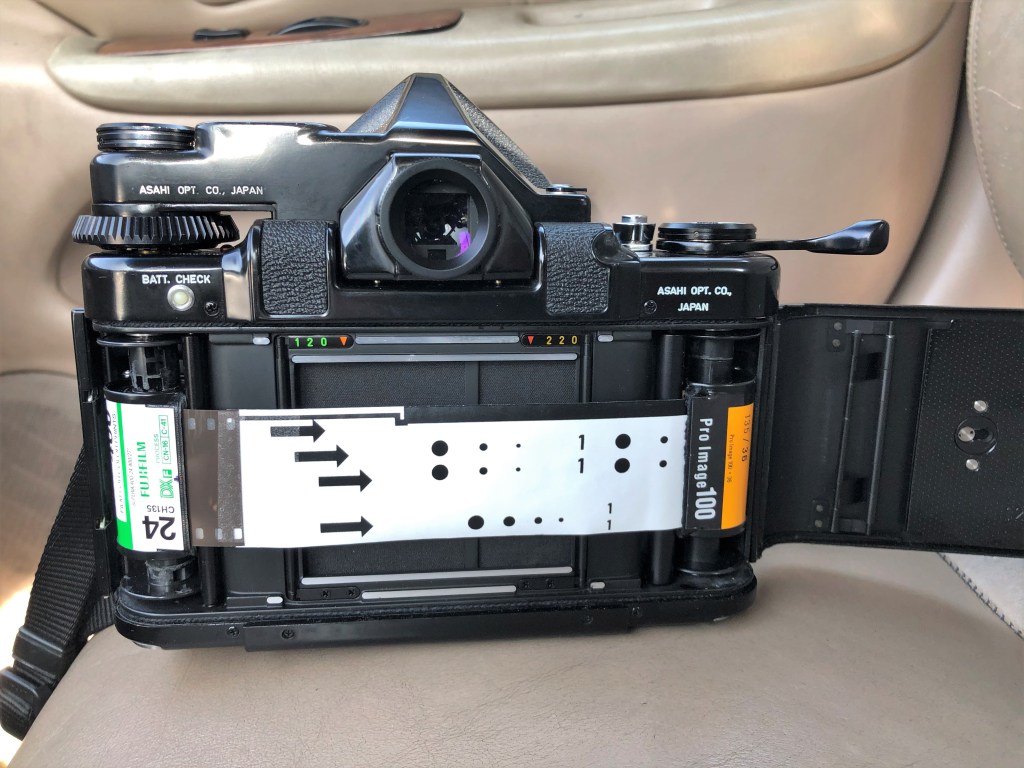
Step 3: Transfer the film from the original cassette into the empty cassette in the dark bag. So now you have 2 cassettes connected, and the film will be transferred from the new cassette into the empty cassette. Of course the transfer process is done in the dark bag. Why you must transfer the film from new cassette to the empty one? Because the point of this method is to let you unload the film in day light. So when you finish the roll and wind all the film to its original cassette, you open the camera back to take the film out, the backing paper strip that you taped earlier will be there at the end of the roll, and you don’t loose any last photo.
All the film was winded to the empty cassette, as you can see the white tape at the very end of the film roll is on the original cassette’s side.
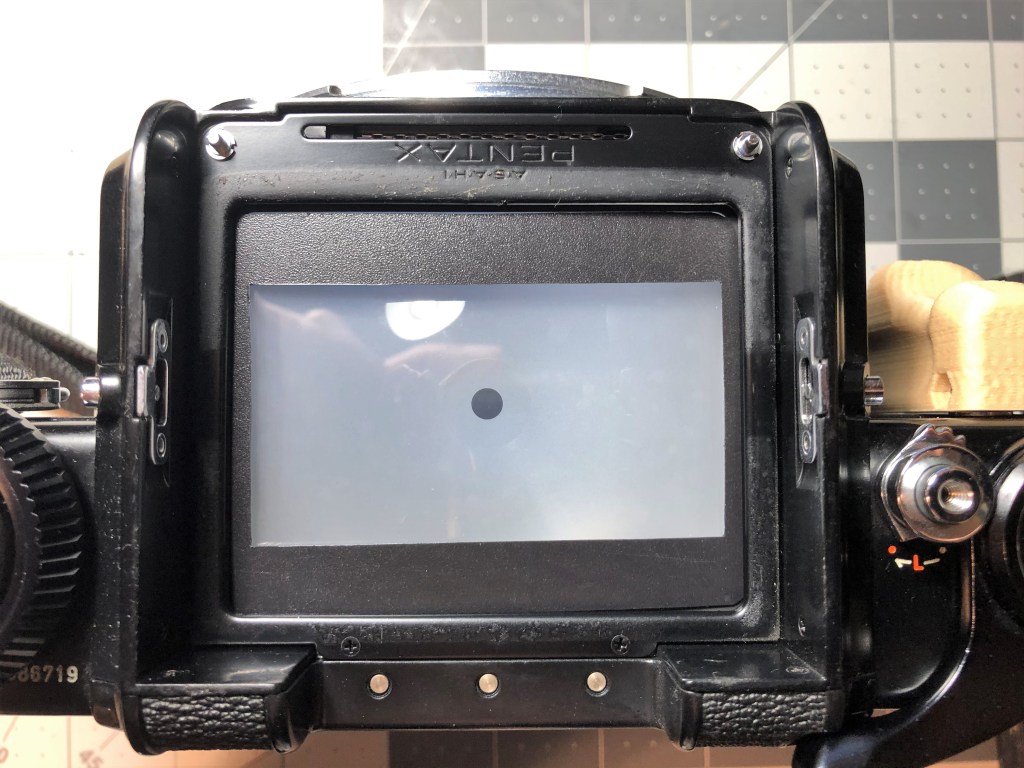
Step 4: Cut out a rectangle in a piece of black paper, the dimension of the rectangle is 35x70mm. (This includes the area of the sprocket holes, if you don’t want to include the sprocket holes, cut out the rectangle 25x70mm). Then put this piece of paper on top of your ground glass. This is a guideline for your composition.
A cut out 35x70mm paper for composing in the viewfinder
How you will see the aspect ratio looking through the viewfinder
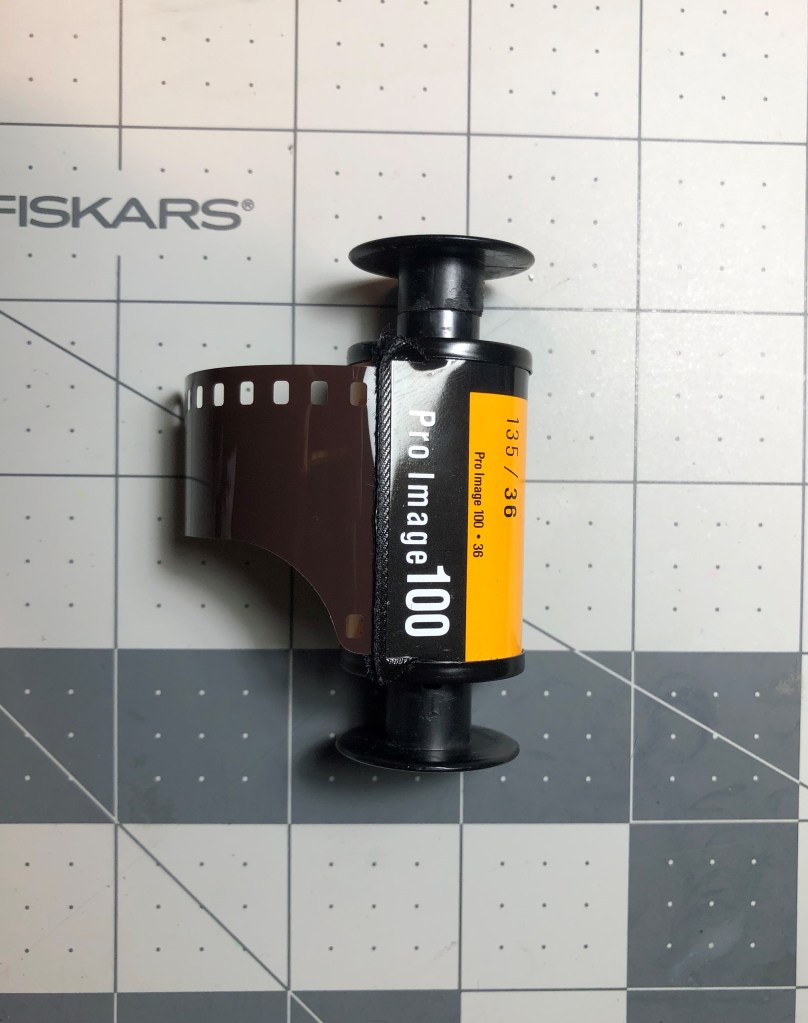
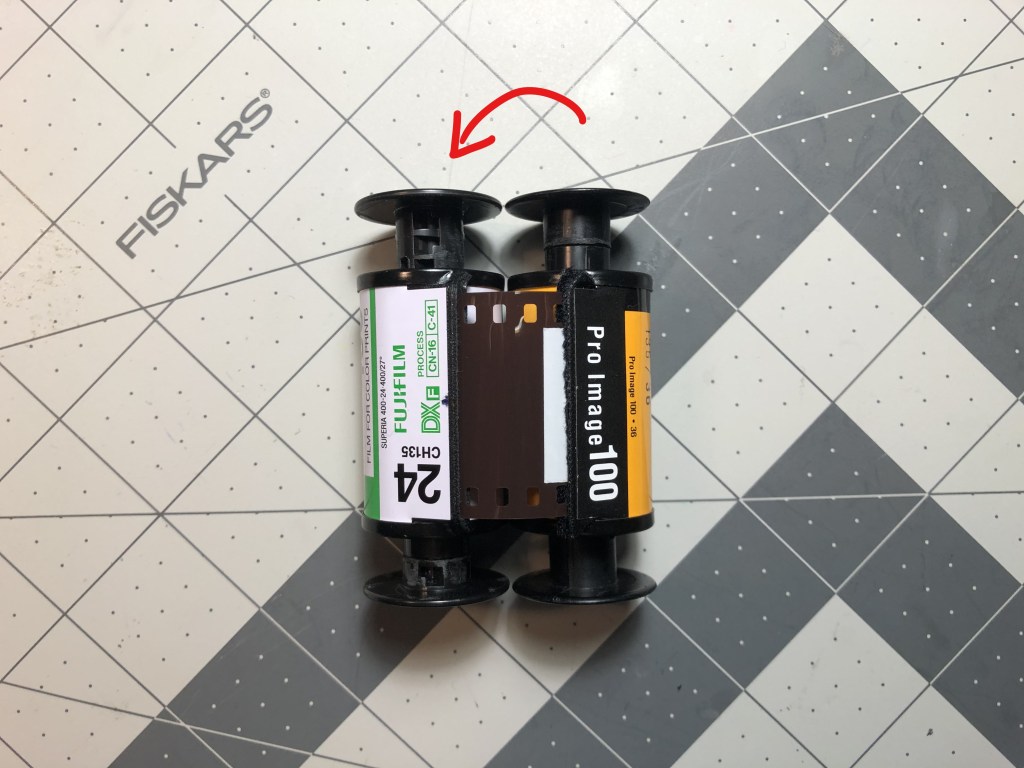
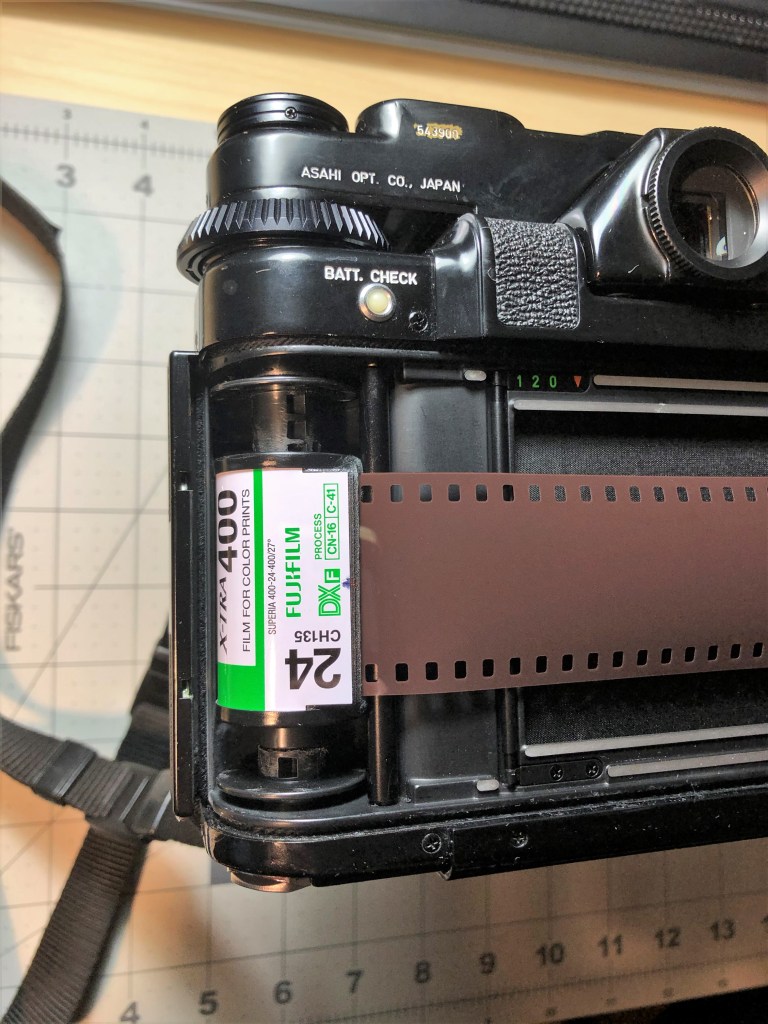
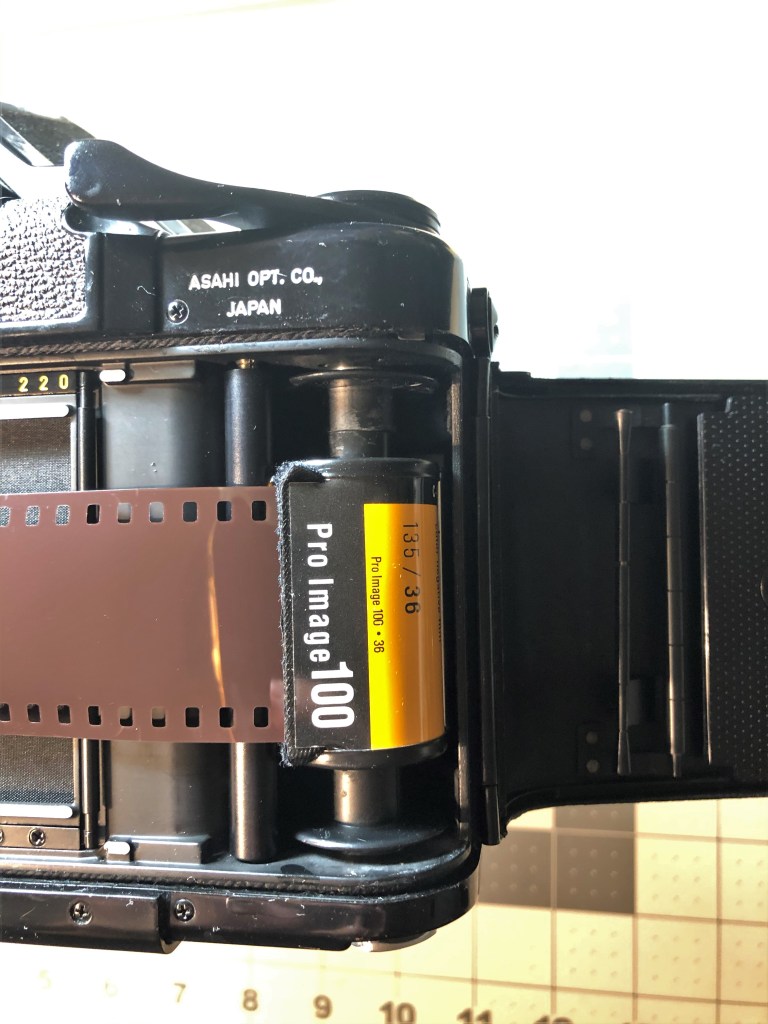
Step 5: Load the film into the camera. Remember to put the old film cassette (which now contains the film inside) on the left side and the pick up cassette (which is the original cassette) on the right side. So now when you take the photos and advance the film, you are actually wind the film back to its original cassette.
Film contained cassette on left side
Pick up cassette on the right side
Film will be transferred from the old cassette to the original one
Step 6: Finish the roll and unload the film. After you finish the roll, you can open the back and remove the cassettes out of the camera safely. You will see that the film in winded into the original cassette and the part exposes to the light when you open up the camera is the paper strip you taped in. You can just remove the film lead from the paper strip and reuse the old film cassette and the paper strip again.
Open the back to unload film when you finish the roll
So now you have it, a method to take panoramic shots on your Pentax 6×7 without requiring going to dark room to unload your film. All you need to do is preparing your film upfront as a set of film cassette and pick up cassette, and you can have more freedom shooting in the field. I was able to get 15 shot out of the 36 exposes roll but I was messing with the loading part, I think if you can load the film more careful than me, you can get 18 out of the roll. I will update the exact number of the shots you can get when I finish the second roll.
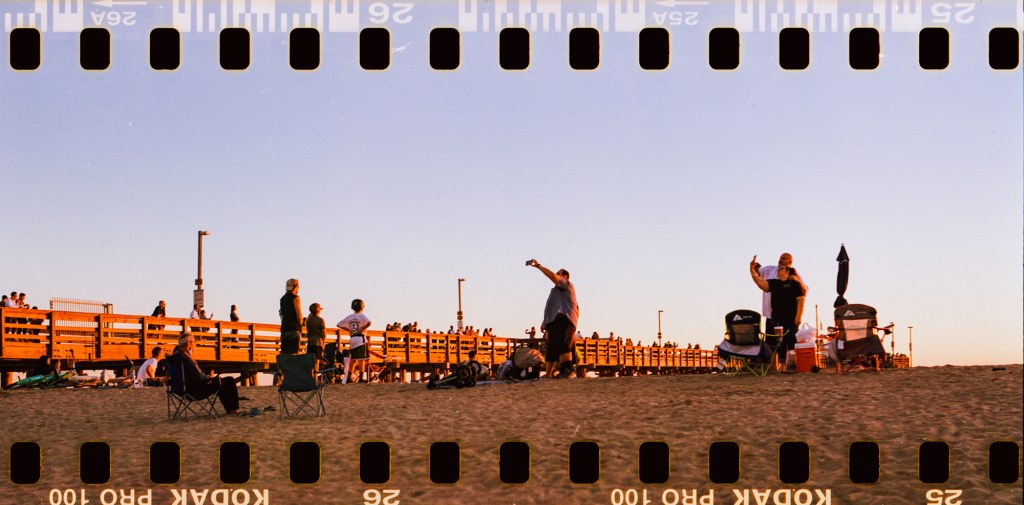
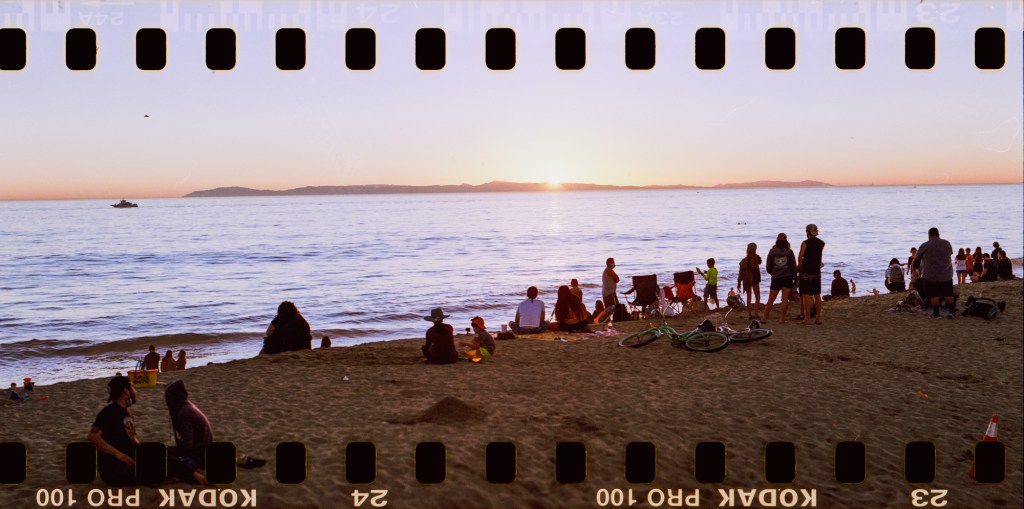
Here’re some photos I made with this first try. Taken with Kodak ProImage 100.
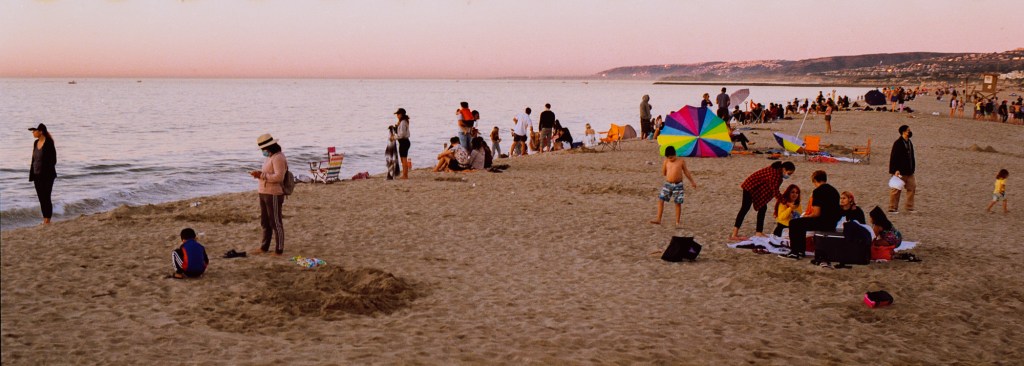
I love the photo of the man on the bike, it’s too bad that it’s underexposed but when I took the shot I knew this would work well on panoramic aspect ratio. You can also see that the ones with no sprocket holes are the ones I couldn’t get the horizon line straight 🙂
My favorites from the roll is this pair of photos, taking of the car in front of the house. I took the photo on the right side first and walked couple steps more to realize that the tail of the car and the scene was quite interesting and could make a good photo, so I took the second one. I think these 2 look very nice together because the continuation of the object, which is the car make the photos stand well next to each other. And I also like the idea of “the beginning is the end” cycle in the left photo, it’s not that literally but the photo starts with the head of the black car and ends with the tail of the silver car, like the end and the beginning come after each other. Or maybe I like series “Dark” a little too much 🙂
I love the last photo also. The frame feels a bit too much and messy but I like the overall feelings and colors of it.
Thank you for making it to the end. Hope you like these experimental photo ideas. Cheers!
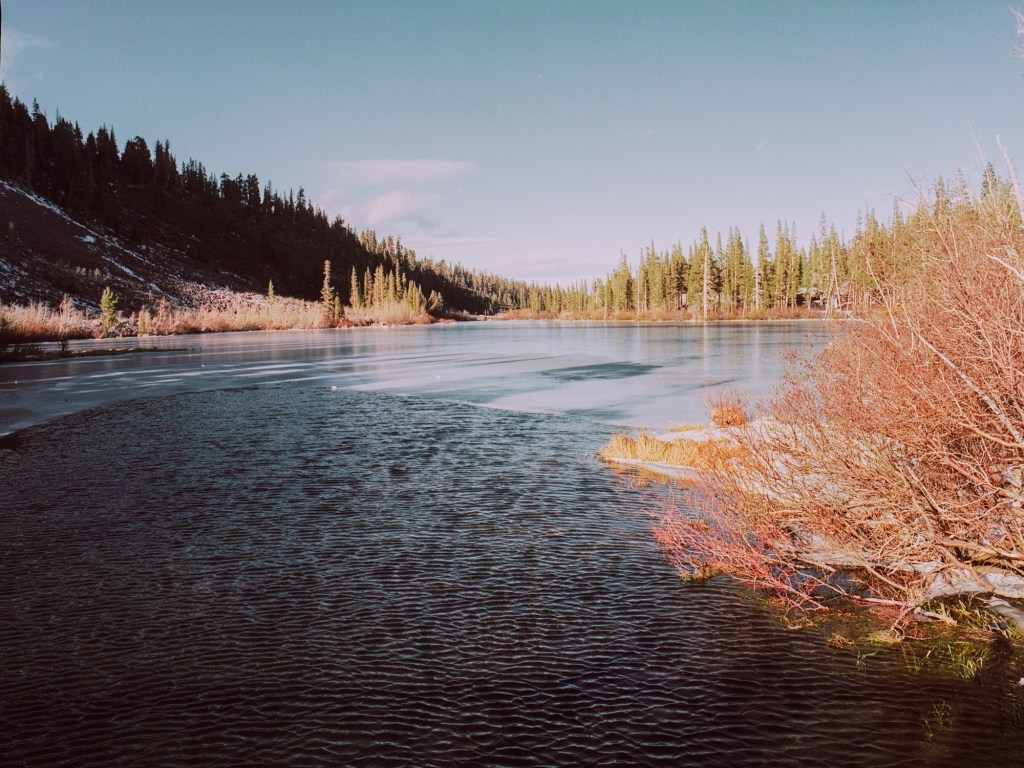
Here we are for the continue part of my Mammoth Lakes road trip.
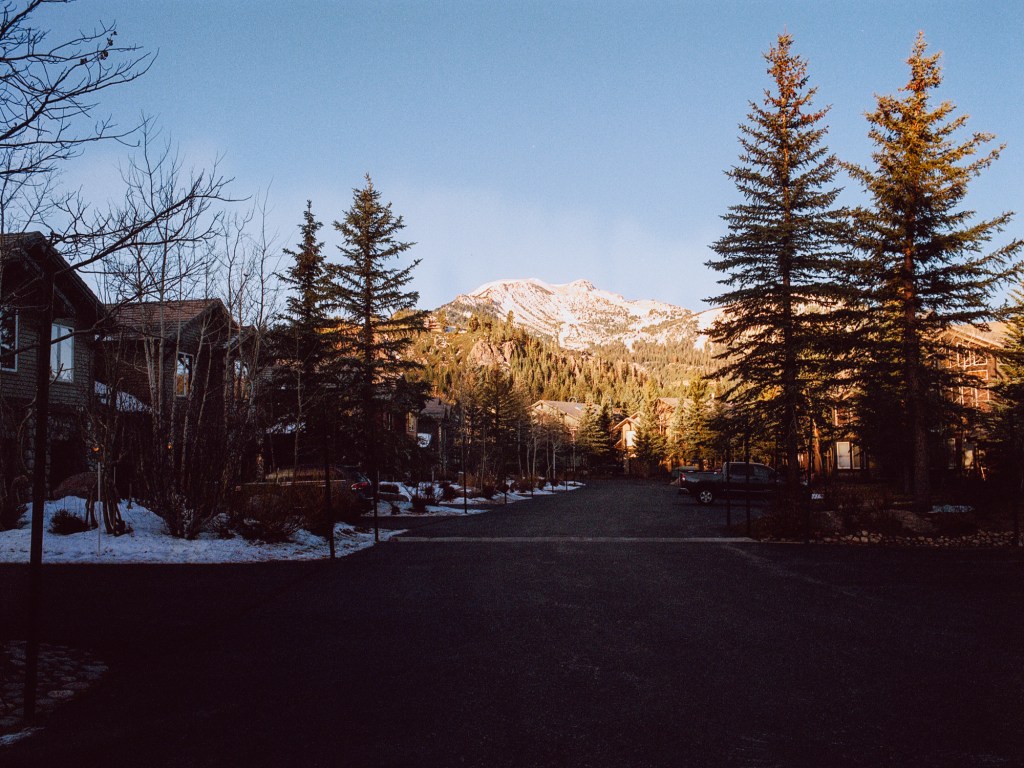
After the first day of going to Gull lake (which is I took a roll there but no photo came out that I want to post here 🙂 ) and another frozen lake that I forgot the name, we came back to the lodge because we weren’t sure to be out when the sun went down. So after getting back to the lodge, I walked out to take some sunset (or blue hour, for more precise) photos at the Meadow and stopped frequently on my way to take some nice house scenes. Here’re the photos that I like the most from the trip.
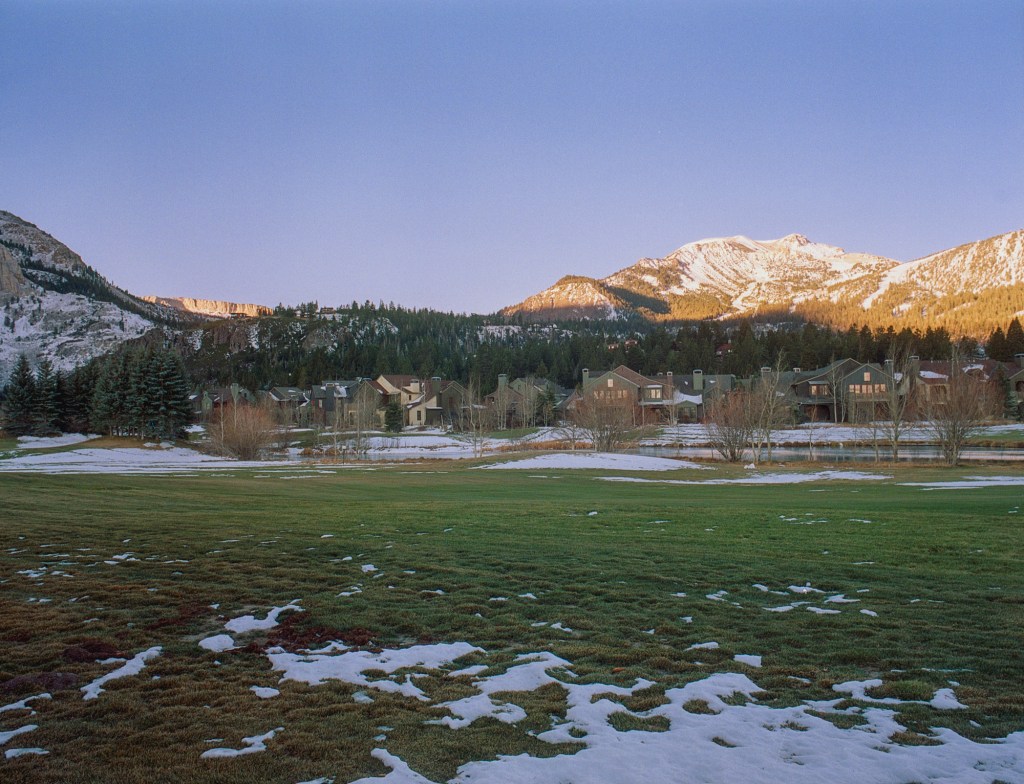
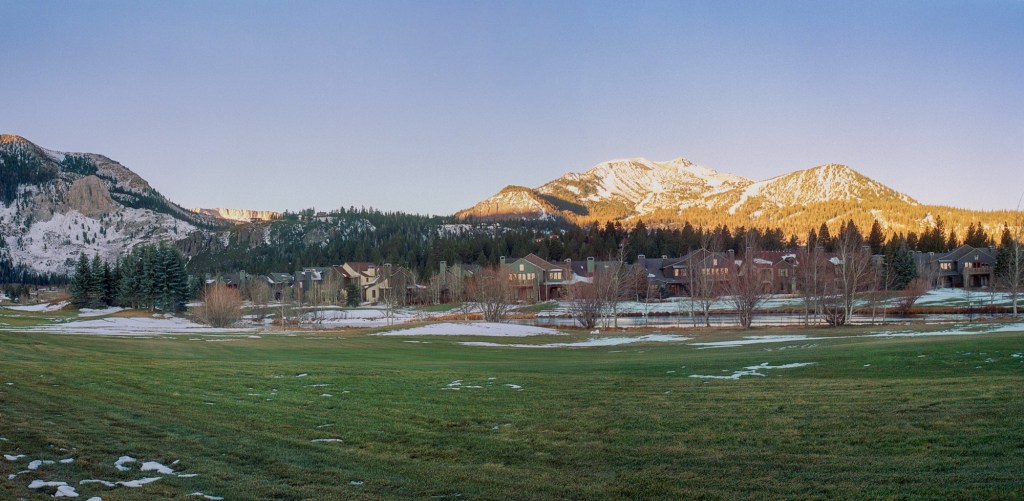
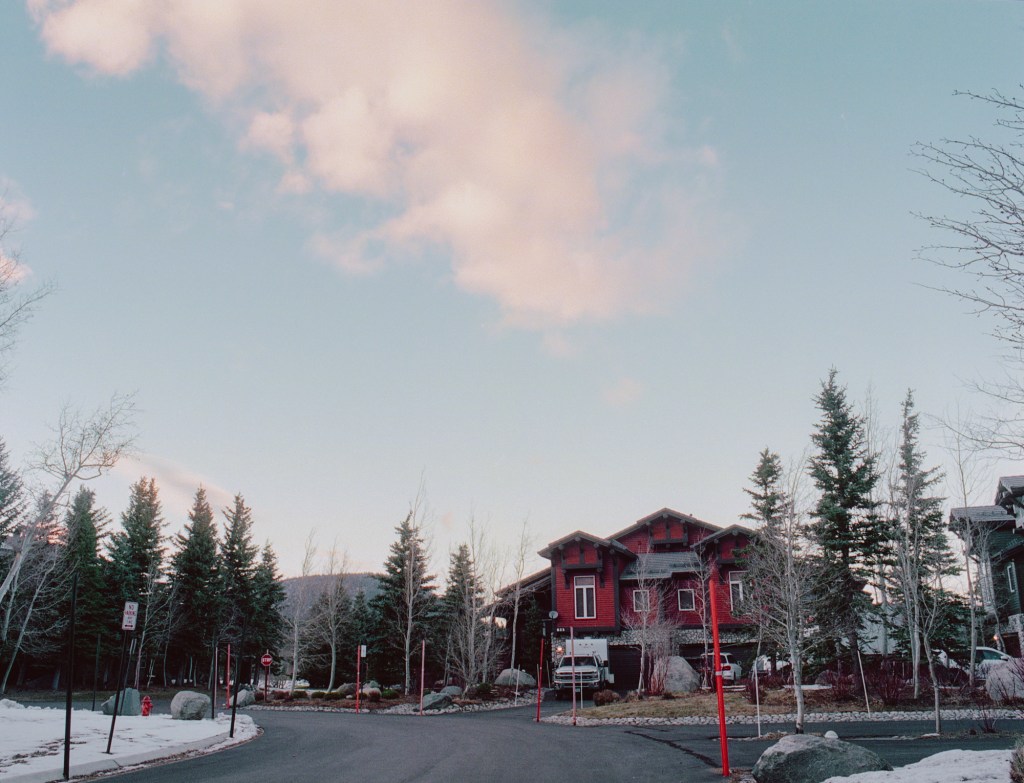
The first one is photo of one street in the lodging area, I captured it because it gives the general feel and architecture of the area, along with the massy mountain behind. The second one I took because the nice red house is quite interesting and the cloud above has a very nice shape and color. It’s a bit hard to take everything into the frame but I quite happy with the result, the only thing I don’t like is the bright red pole in the foreground that overlaps the house.
The photo on the right is when I went back the the lodge and the sky was dark. I saw the light from the light bulbs from the house was quite interesting and the tree in the front also had a nice shape and texture so I set up the shot for a long expose photo. I like how it came out but still think the composition is a bit off. I think if I had stepped back a bit and moved to the right couple inches, the composition would be much better, because the roof of the house wouldn’t ended right at the frame lines. Another lesson for watching your composition carefully before taking the shot.
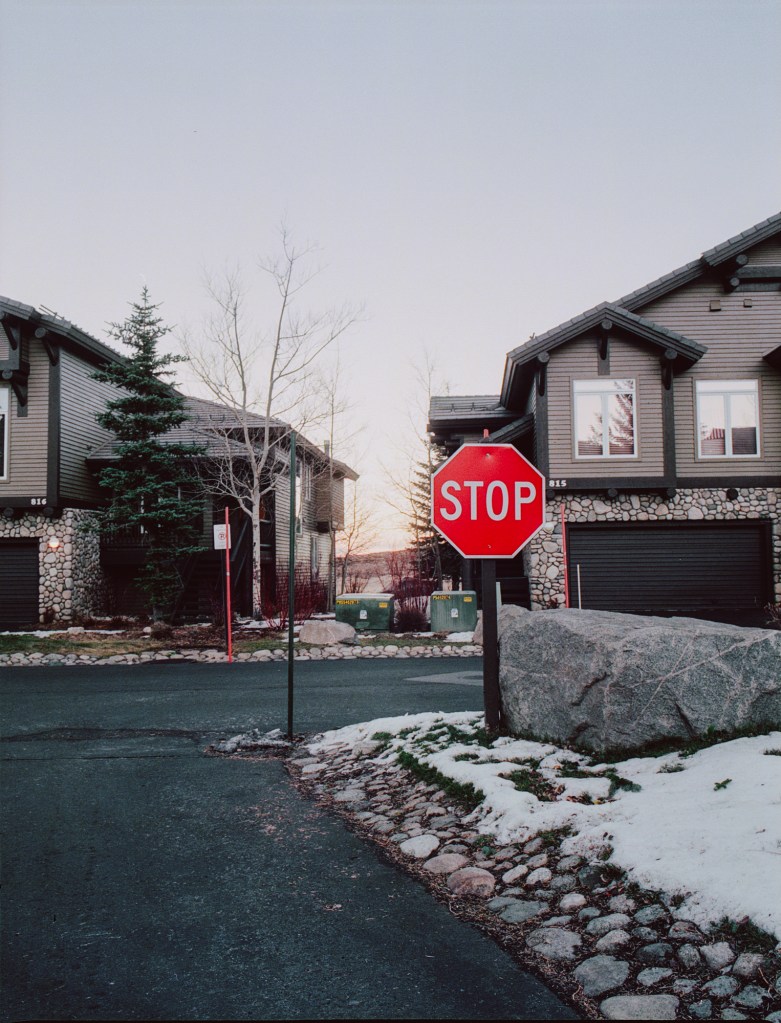
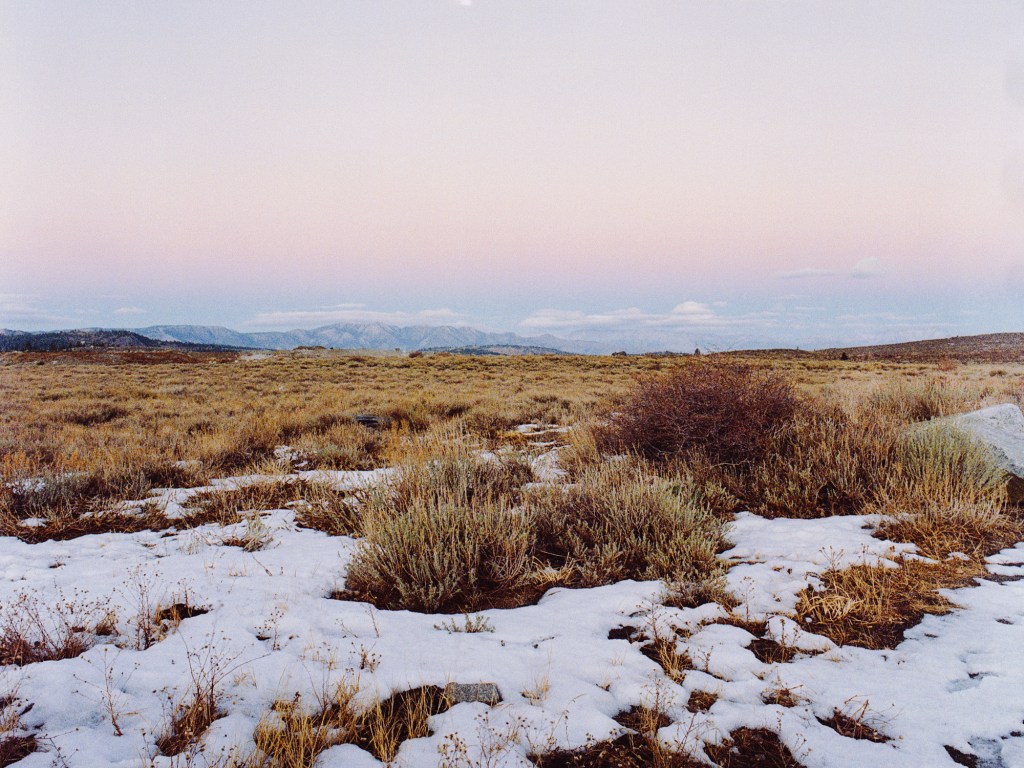
I like this very much. This is the first photo I took when I walked out for the sunset. The sun pretty much hided behind those mountain already but there’s still a bit orange glow at the horizon. I think the colors here work together very nice, the red is pop but not taking away the cold calm vibe in the photo. The reflection in the glass window also looks so dreamy and poetic. I also like the composition and the complex of the scene. To me, everything works together very well in this photo.
This photo of the “Private Property” sign I took on the way back to the lodge. It belongs to the Snowcreek Golf Course. I think the photo represents very well the calmness and coldness of a winter sunset in a meadow surrounded by mountains.
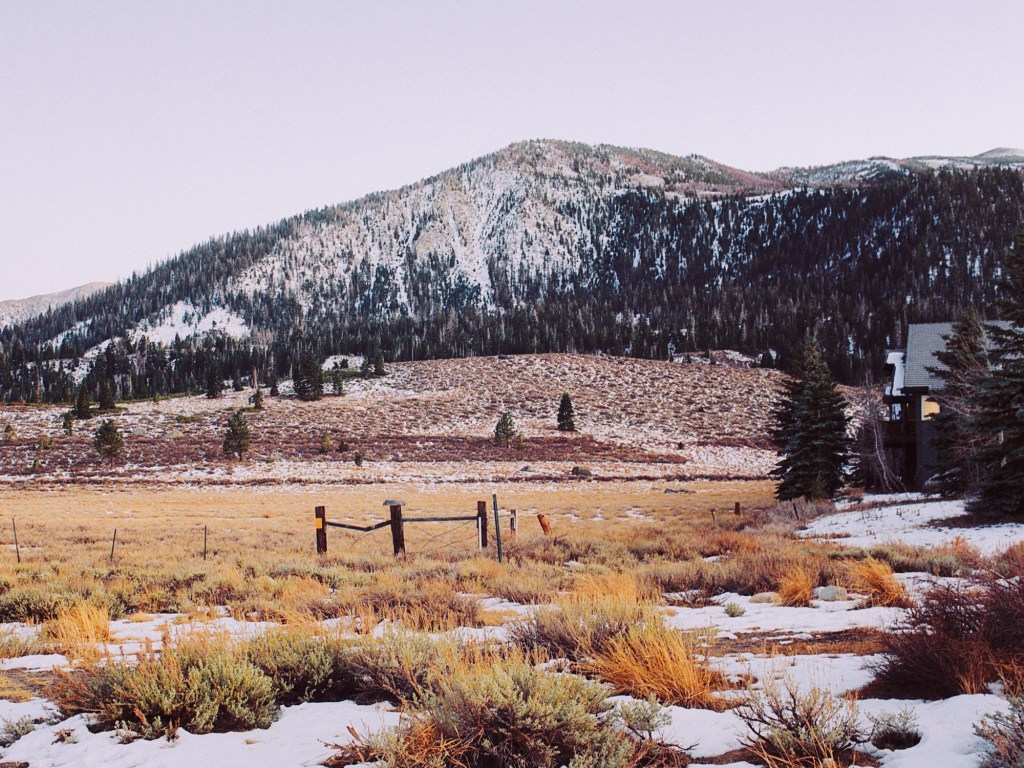
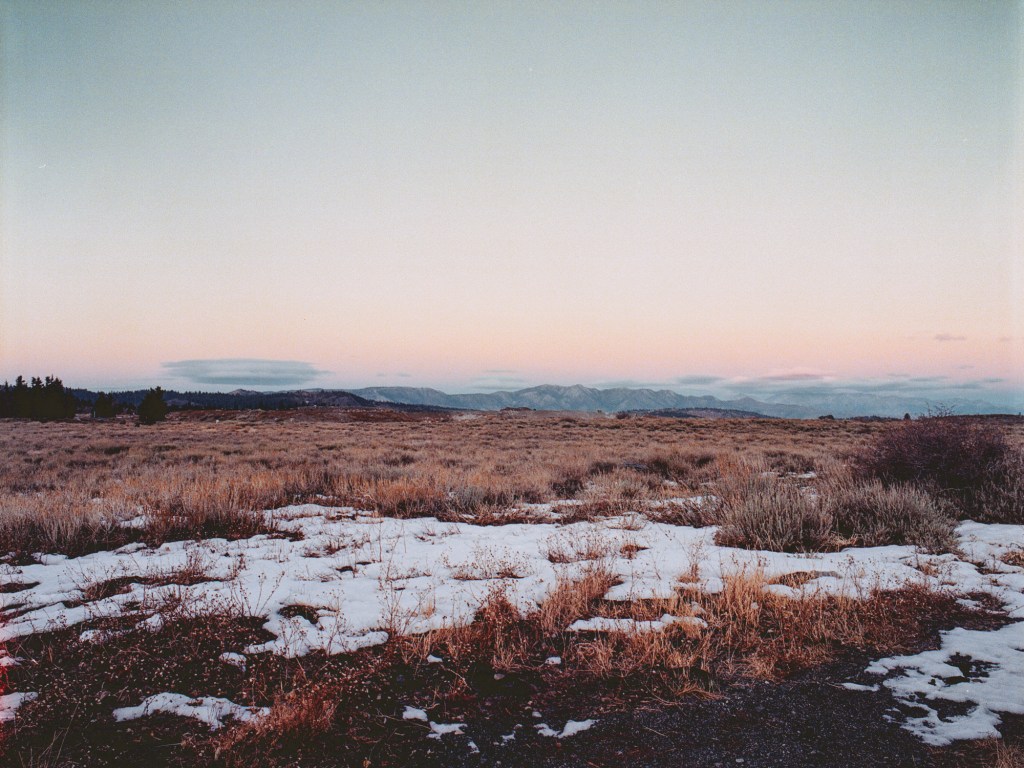
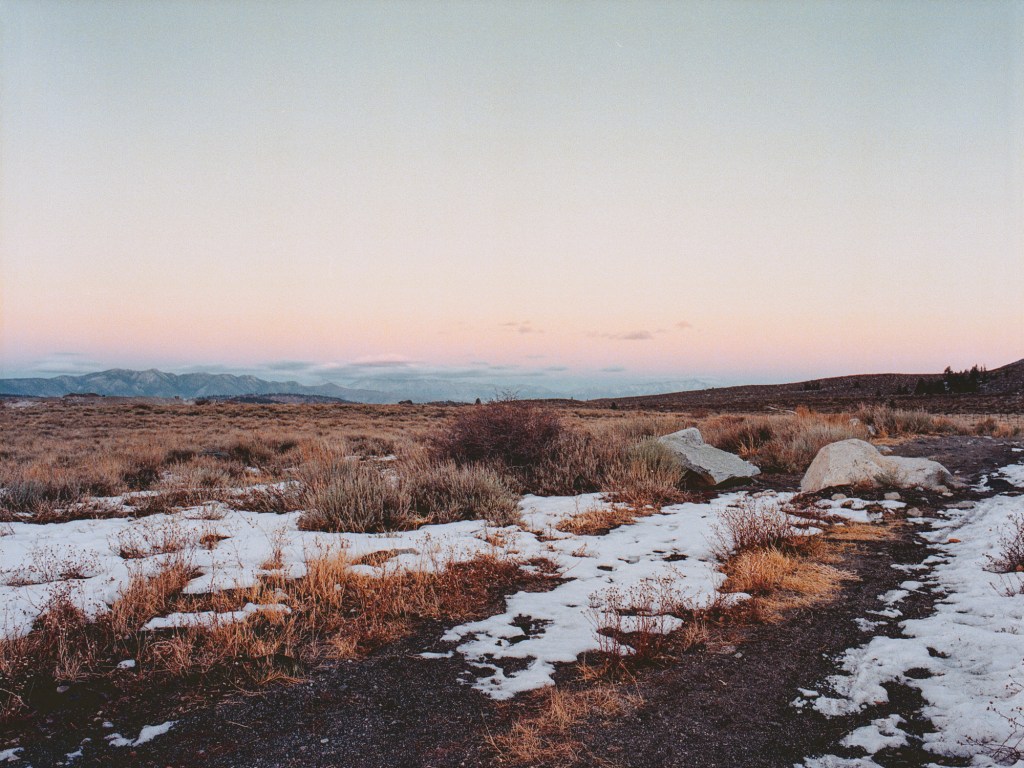
The photo above here is the first one I took on the Meadow. Took with Portra 800. The sun was behind a peak of mountain but the field still have plenty of light and the glow at the horizon was so beautiful. After took this shot, I managed to take the photo on the left, of a part of the house and the mountain behind it. I think the photo is not bad but still something is off about it. The reason I didn’t include the whole house because I wanted the photo to be suggestive, not just show the objects straight out. I also like the little fence[?] in the middle of the frame, it adds a very nice touch to the field. One thing I think I could do better for this photo is exposing for the house to get more details out of that, and hopefully don’t blow out the highlights. In general I still like it but it’s not good enough to be showed as my best work.
On the right side are photos I took when the sky is almost dark and there’s not much light on the grass field to expose. I took these in the much longer shutter speed than the previous photo above. You can see how much the difference is compared to the earlier photo taken 10-15 minutes apart. This merged photo describes the vast scene of the meadow in blue hour. I really enjoy this photo.
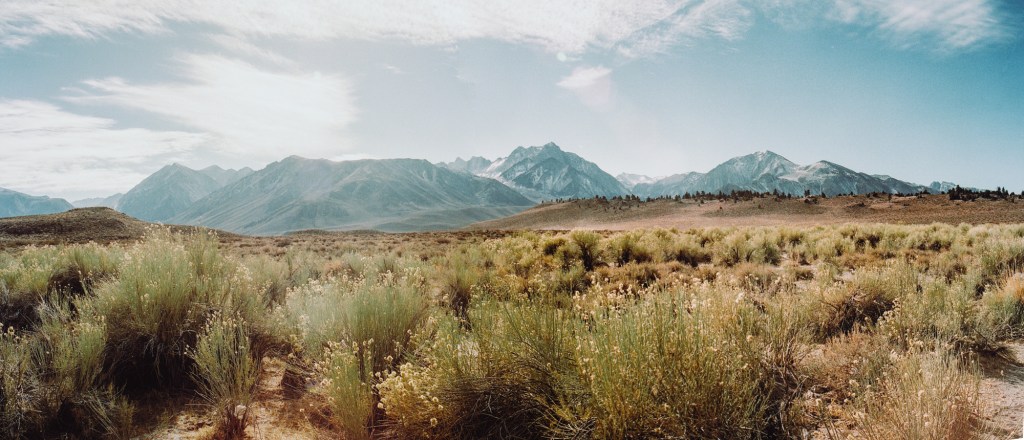
The photo below is another panorama merge from 2 photos. This is the scene at Rock Tub Hot Springs. The tub itself is quite small and funny in the middle of the vast land. When I got there, the sun was high up and the sunlight was extremely harsh. I took a couple photos but nothing come out as I like, so here just a photo for you to have an idea how the landscape looks like. All the daytime photos were taken with Fuji Pro400H.
Final photos from the trip are some I took on my last hike to the place I forgot the name again, but that’s a long hike that passes couple lakes on the way. We could just have enough time to hike to the first lake and then had to come back but it’s quite a nice hike with beautiful view. The light was softer and warmer as it’s afternoon and we really enjoyed the hike.
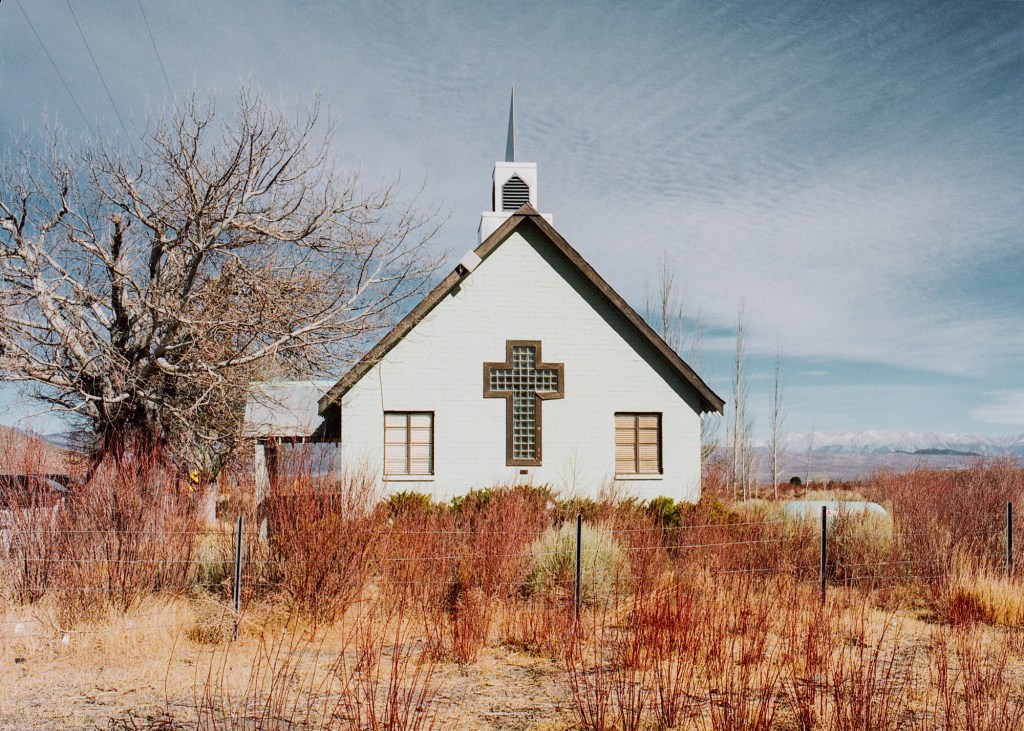
The photos above are of the Green Church near the hot springs. When I first saw it on the way to the hot springs, I was fascinated by it. A small green church in the middle of no where, who can resist that? So on the way back from the hot springs, I stopped by and took these photos. Of course with the harsh light condition, I could get the photos as good as I want. I really hope I can come back and take photos of this church in a better light. The last one is the composition that I like the most. I don’t really know why but I like the fact that a part of the building is included with the backdoor stairs and the white fence with the gate. You can also see the grass in the field behind and the mountain at the horizon. There’s many elements in this photo to look at.
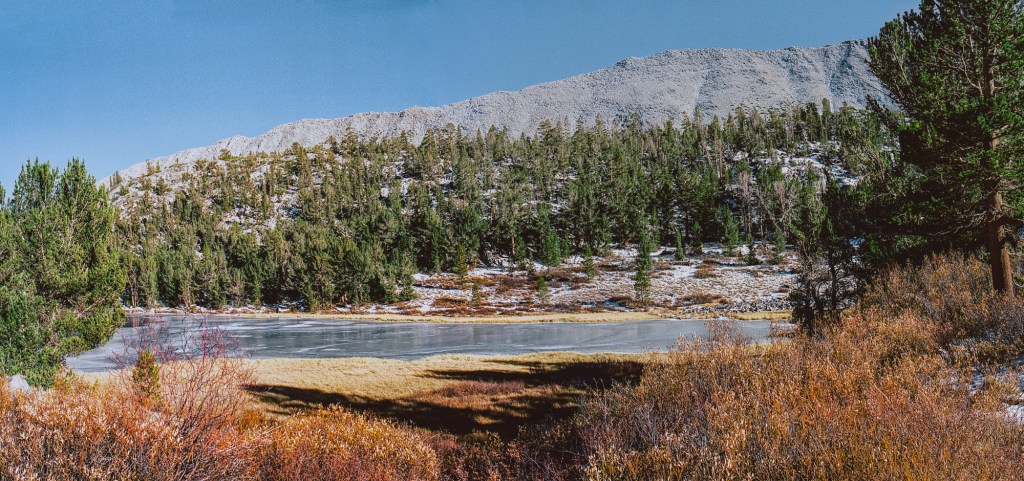
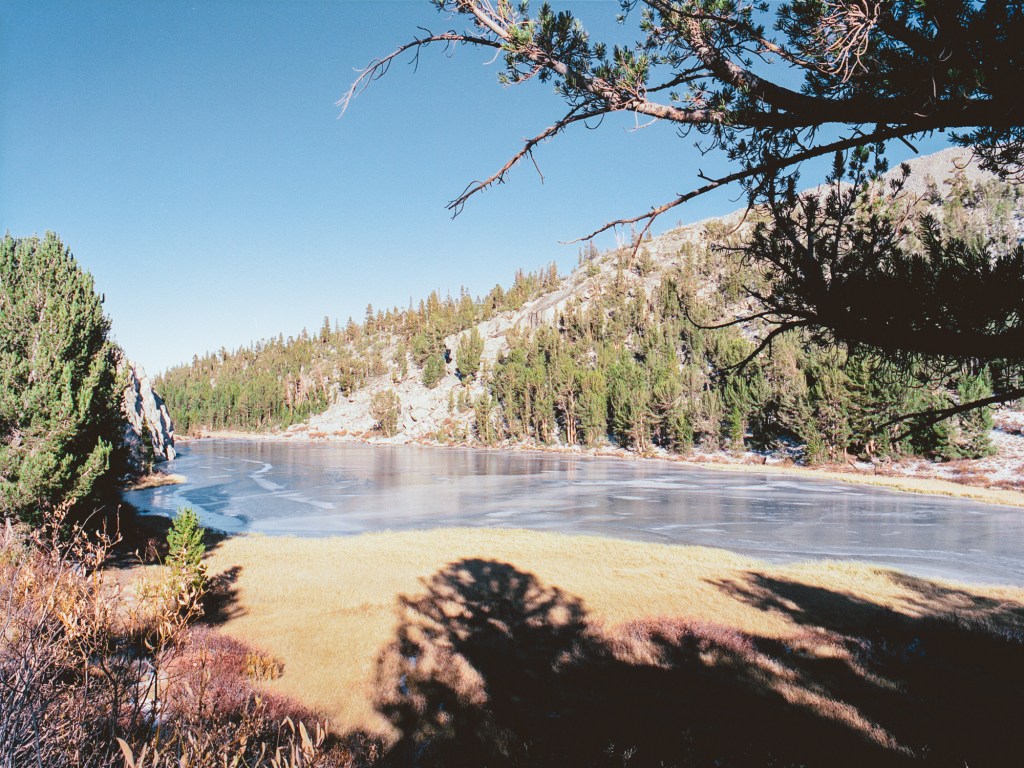
As you can see, the 2 photos on the left were merge to make the panorama below. Just so you know the view of the frozen lake that I got to see after the hike. I wish I could come down closer to the lake to have more close up photos but we’re really low on time so this is all I could get. I don’t think the composition is that good but it’s nice to see the whole view. I like the yellow grass field by the lake and the color of the sky reflect on the frozen surface.
The last 2 photos are other composition that I took of the lake from a closer spot. I like the final one because the branches at top right foreground and the shadow at the bottom combines to give a direction to the eyes to look at the lake surface. I definitely blow out the highlight in this photo but I like that you can see the cliff behind the left side tree that you cannot see in previous photos.
That’s a wrap for this Mammoth Lakes trip. Thank you for making it all the way here. Hope you like the photos. Cheers!
It’s 2 months late after the trip to publish this post but I worked quite hard on the photos so I hope you enjoy it. I went to Mammoth Lakes in the middle of last November. The trip was nice and lovely, the weather was beautiful. This trip gave me some favorite shots that I’m quite happy with. In this trip, I tried something new with my photography: first, I practice merge 2 photos together to make a panorama scene; secondly, I used my new wide angle lens for the Bronica, the PE 50mm/2.8, for the first time. Having a wide angle lens gives you much more ability to shoot landscape or just more scenes in general, in the end, I shot all the photos here with the 50mm lens. Since I have a good amount of photos to share here so I make it 2 parts because I don’t want to overload my page or make you wait forever for the photos to load.
Since it’s 2 months already so I apologize for forgetting the names of some locations that I took photos of. When I went to Mammoth Lakes, the weather was very nice, not very cold, there’s thin layer of snow on the ground but I did not see any snowfall. The fall leaves were long gone and the snow was just appeared. The sky was very clear and bright in the morning and afternoon, at noon, the sky was so blue and the sunlight was very harsh, made it so hard to take photos at this time.
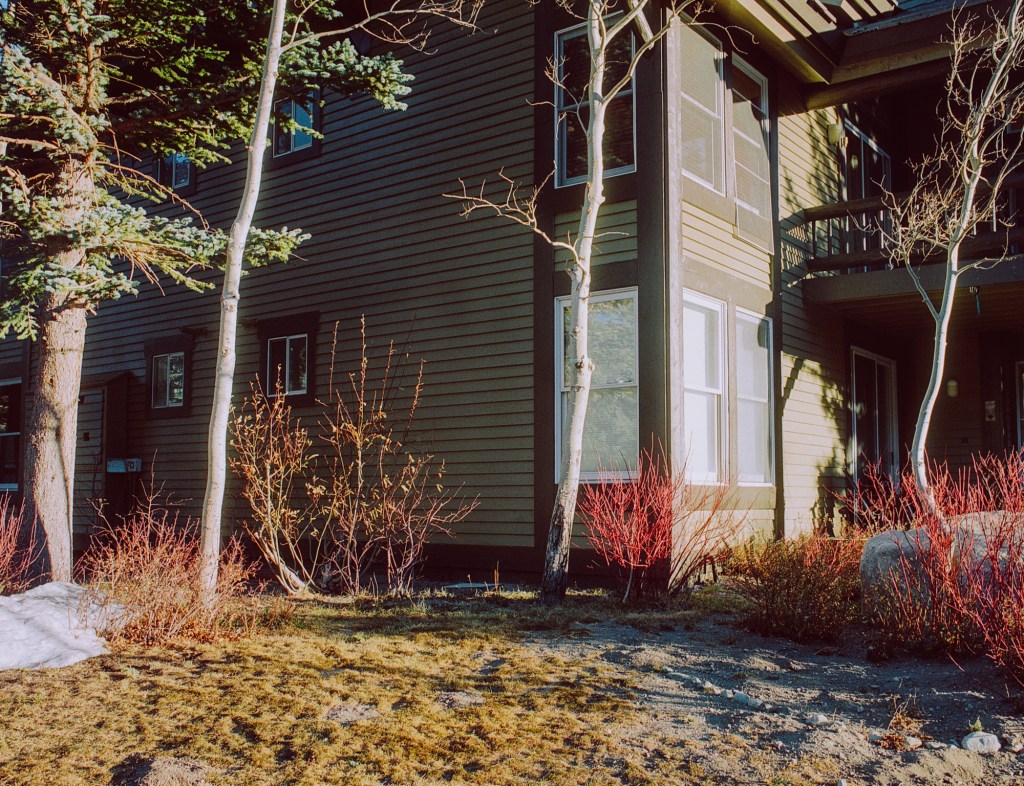
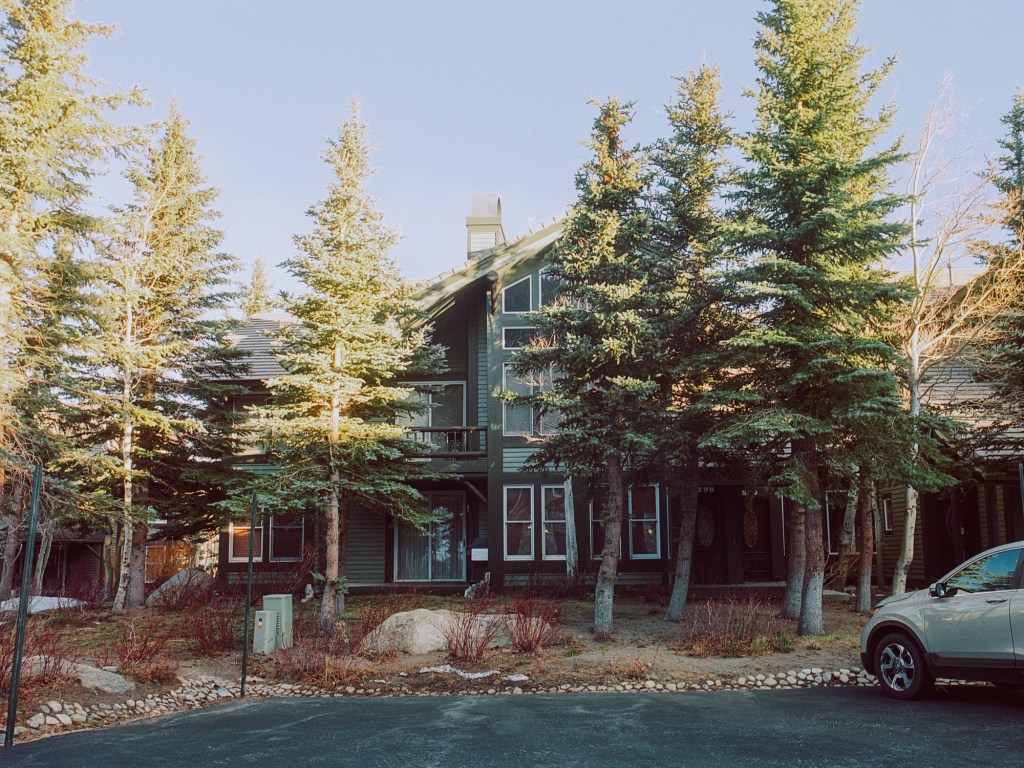
First off, let take a look at the area my friends and I stayed during our trip. It’s a lodging [compound?] called Snowcreek, it’s located by the Kerry’s Meadow and next to the Snowcreek Golf Course. These photos here I took with Bronica 645 system and Portra 800.
The first photo is the road at sunrise. This is a very high contrast scene where the peak of the mountain is lit up but the road and houses down here was very dark.
Next is some houses in the sunrise light. I took these with the promist filter 1/4 to have the glowing affect on the trees and windows.
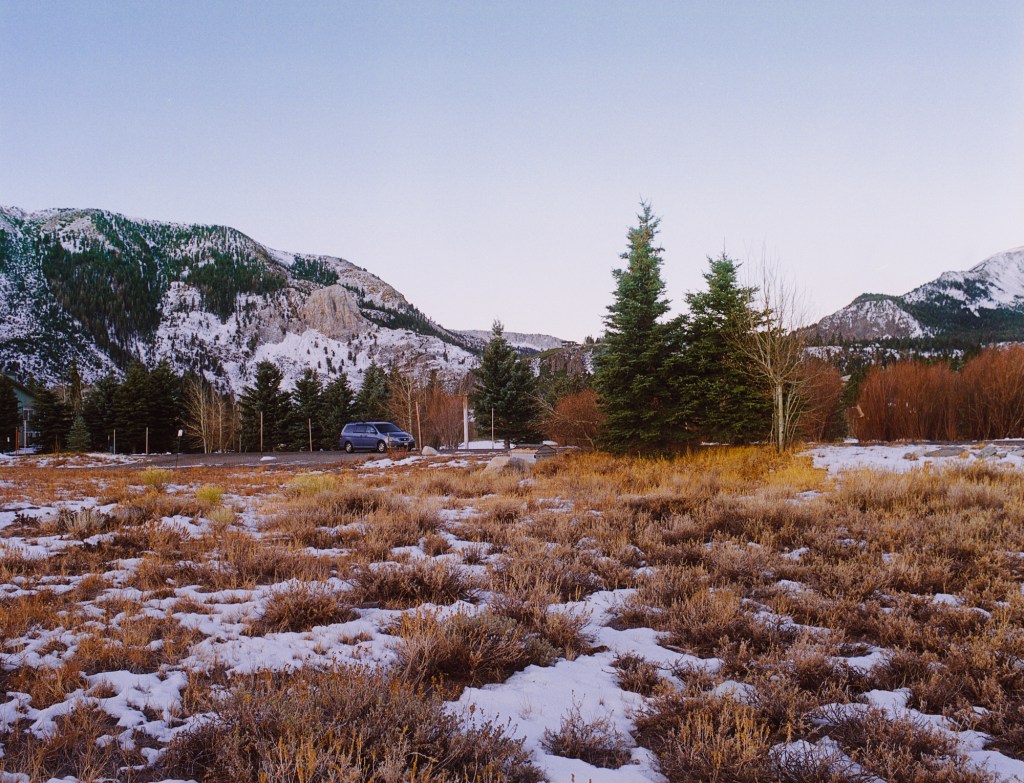
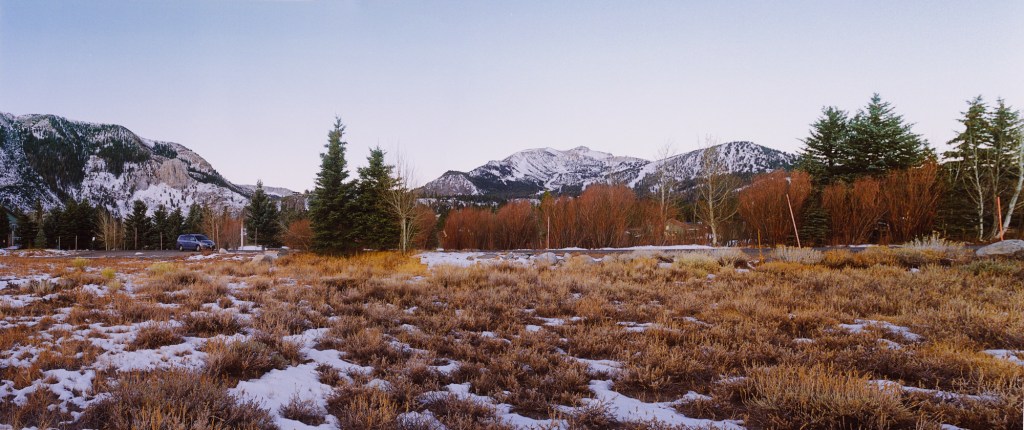
Next, the photos of the sunrise view that I took from the edge of the Kerry’s Meadow looking at the Mammoth Mountain. My specific spot here is just off the road between the Golf Course and the Meadow, I didn’t walk into the Meadow although it could be great if I did. Here I combined 2 photos together to make a panorama of the scene. When I went to the Meadow for the sunrise, I noticed the blue van was silently parked there, they must went there to watch the sunrise just like me. Even though I didn’t know them and we never talked to each other but since we came there for the same reason, I feel a connection to them, like ‘we were a same place at a same time waiting for the same thing’ vibe. Besides, the van is a nice addition to the photo in term of showing the scale of the scene. At this moment, the sun haven’t come out yet, as you can see the scene is flat and dim.
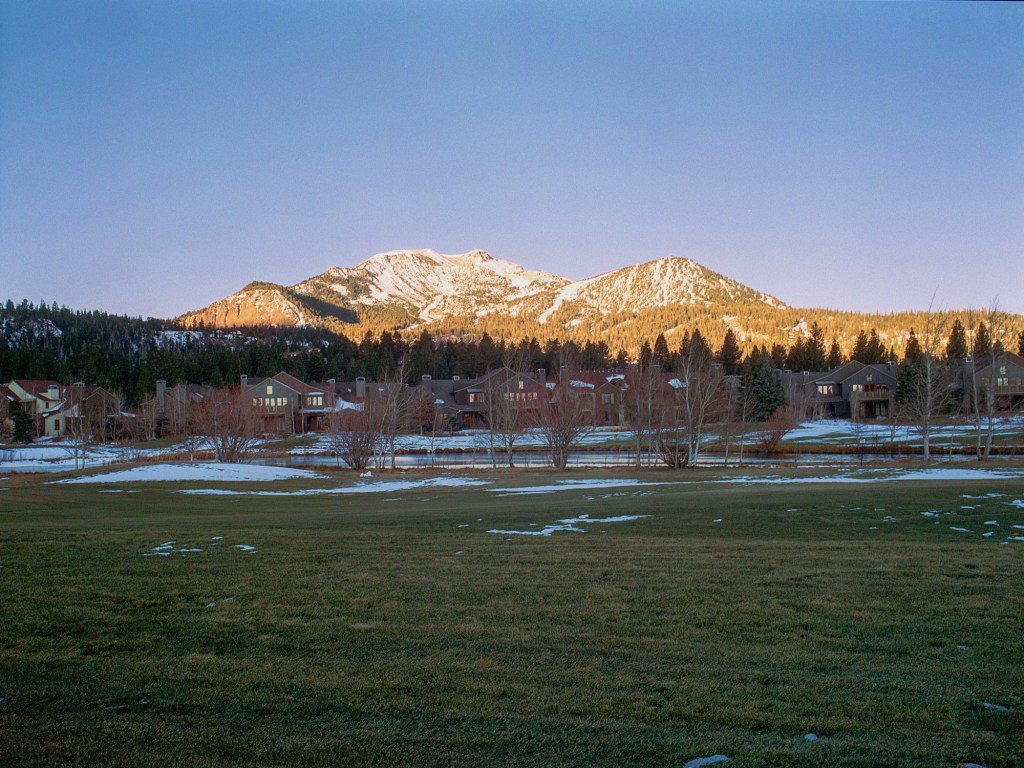
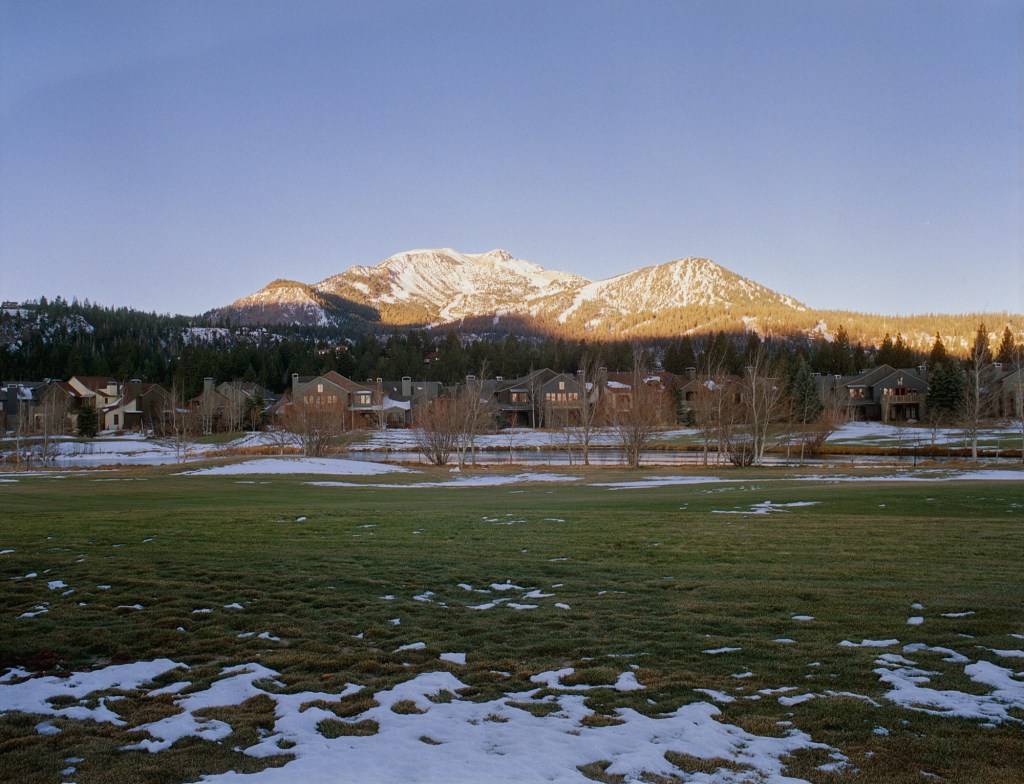
This one here is the view from the edge of the Golf Course looking at the peak of the Mammoth Mountain when the sun rises up.
Another panorama photo. I think I watch a lots of Nick Carver’s videos to make my photos into panorama ratio. But I don’t think my composition is that good, the first reason is I didn’t actually see the composition as panorama when I compose the shots, just the estimate and imagine from myself, so when I merged the photos together, the composition is always off. But it’s nice to make these photos and see the scene as wide as I can.
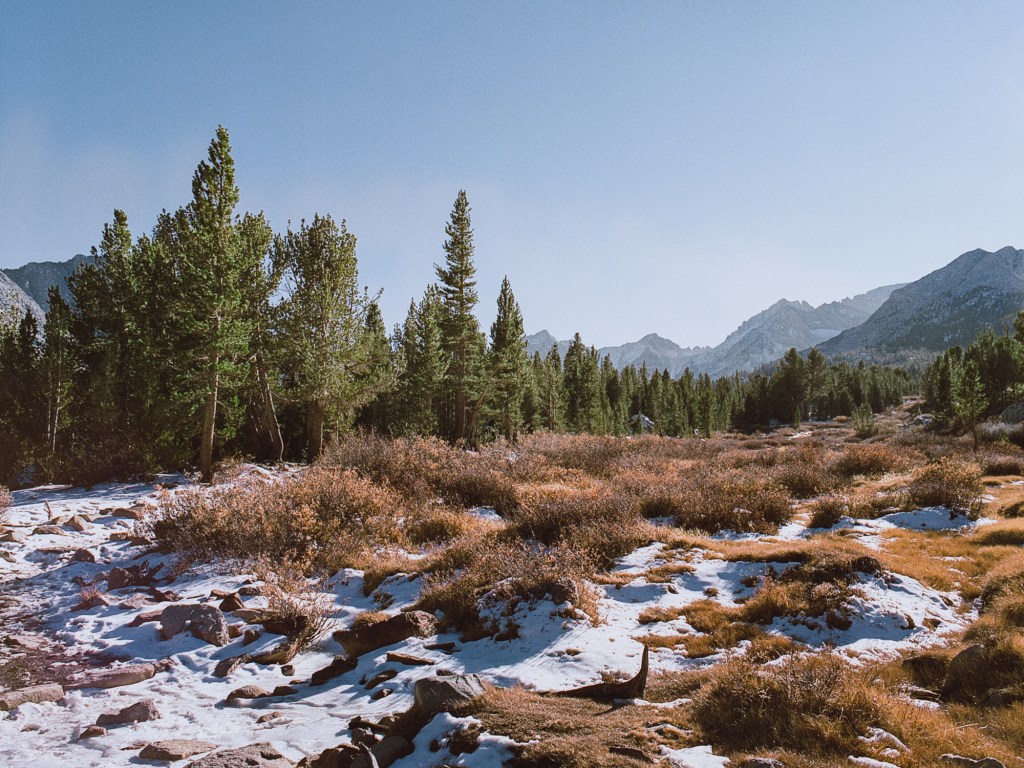
The following photos are some scene on the hike on the first day. Taking photos in the snow scenes was definitely hard because the snow is so bright and if you don’t know how to expose the shadow, your shadow will be pit black, just like my right side photo here. These were taken with Portra 160 expired.
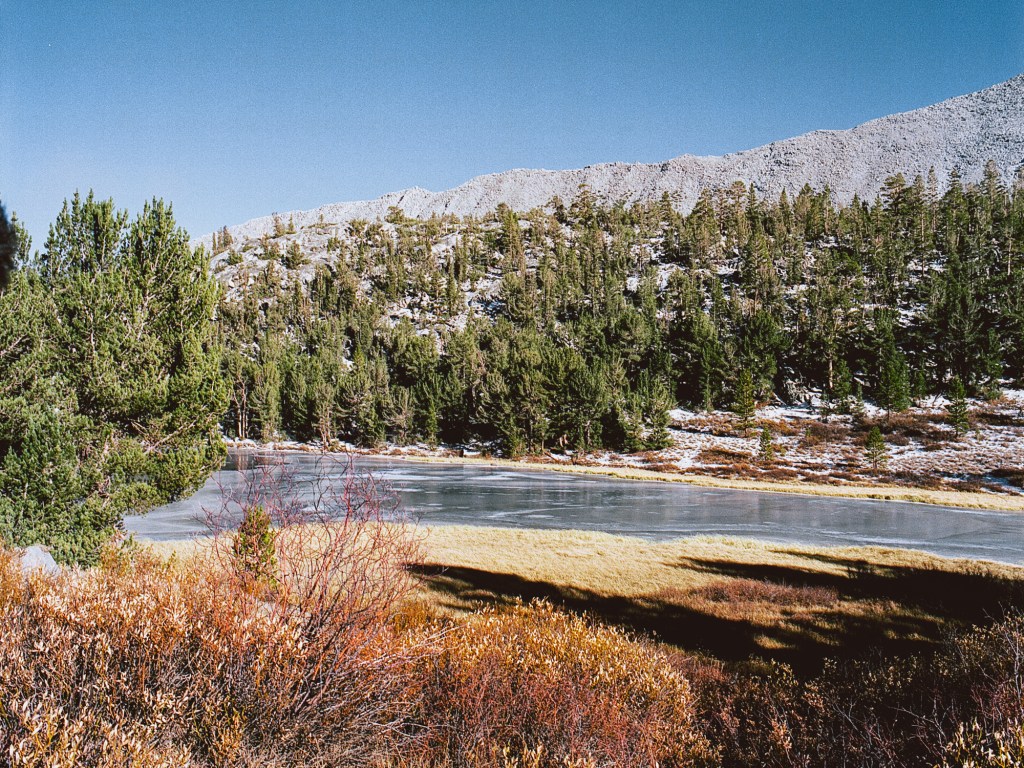
Finally, these are photos of a lake that I forgot the name. I took these in harsh sunlight so the shadow was crushed to black. The film I used here was Fuji Pro 400H. I did heavily edit these photos because the “straight out of the scanner” were so terrible to look at [or just me being terrible at scanning]. The first two are not that great but still give you the nice view of the frozen lake. The last one is my favorite, I like the color palette and the way I can capture my shadow, just something about it makes me keep looking at it.
This is end of part 1. Thank you for making it here. Let’s check out the part 2! Cheers!


![mammoth lakes road trip [part 2]](https://filmsequence.com/wp-content/uploads/2021/01/mammoth-lake-28-1.jpg?w=1200)


![mammoth lakes road trip [part 1]](https://filmsequence.com/wp-content/uploads/2021/01/mammoth-lake-20.jpg?w=1200)